Category: Uncategorized

  • Roof snow load Boise: Safe Limits, Code, and When to Rake

    Roof snow load Boise: Safe Limits, Code, and When to Rake

    roof snow load Boise: Safe Limits, Code, and When to Rake

    ⏱️ 8 min read · Last updated: 2026

    Quick Answer: For roof snow load Boise, the practical rule is simple: if snow is wet, deep, drifting, or causing sagging, you should act before it piles into a structural problem. Boise’s design snow load is commonly treated as 30 psf for many roofs, but the safe decision depends on roof pitch, drift zones, and whether the snow is light or water-heavy.
    Key Facts: roof snow load Boise (2026)

    • Boise design snow load is commonly 30 psf for many residential structures, but the exact code snow load can vary by site and roof conditions under the IRC building code and local amendments.
    • A depth of about 6 inches of wet snow can create far more structural snow weight than 12 inches of dry powder, because density matters more than depth alone.
    • A roof rake is safest when you can reach the roof edge from the ground; a common roof rake safe reach is about 10 to 15 feet, depending on your height and the tool handle.
    • If you see sagging, creaking, bowed ridges, or doors sticking after a storm, treat it as a structural warning and get a professional inspection the same day.
    • When snow is drifting against a parapet, dormer, or low-slope section, the load can rise well above the even-field snow load psf people usually picture.

    Roof snow load Boise is not just a winter worry for older homes. I have seen a perfectly normal-looking roof in West Boise hold steady all week, then start showing a faint centerline dip after one wet overnight storm. The difference was not depth alone; it was water-heavy snow and a drift pocket near the higher wall.

    The hard part is that most advice stops at “clear the roof” or “don’t get on the ladder.” That is too vague when you are staring at 8 inches of packed snow and wondering whether to leave it alone or start pulling it off. In 2026, the better call is to match the snow condition to the roof condition, not to guess based on the calendar.

    In Boise, wet snow on a low-slope roof is usually more concerning than a deeper layer of dry powder on a steep roof.

    How roof snow load Boise actually works on a real roof

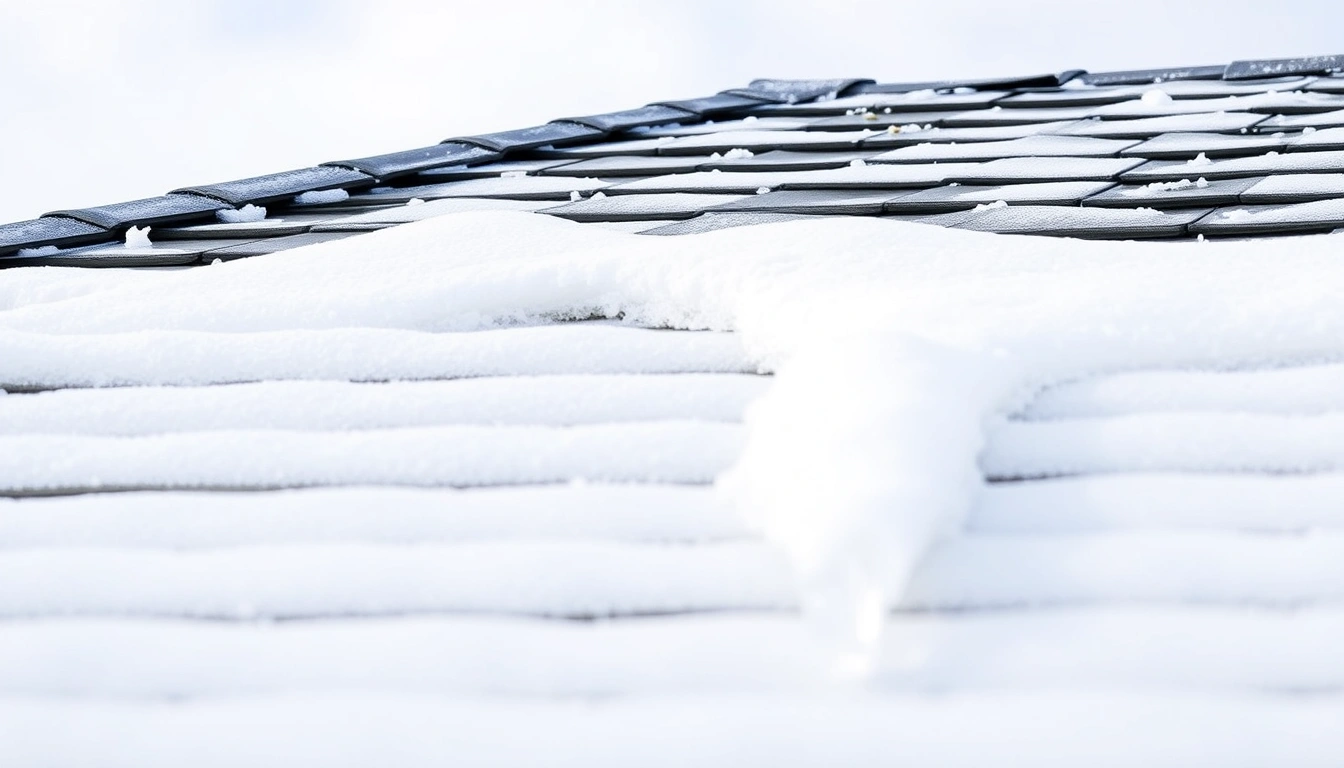
    Roof snow load Boise is about weight, not just depth. A roof can carry a surprising amount of light, fluffy snow, then struggle fast when the snow turns dense, wet, or uneven.

    The load is usually discussed in psf, which means pounds per square foot. That number matters because 10 inches spread evenly is one thing, while 10 inches sitting in a drift behind a chimney is another. I have checked attics after storms where the drywall seam looked fine from the street but a ridge line in the snow hinted at a load concentration above.

    What the roof is actually feeling

    Think in layers. The roof deck carries the snow, the trusses or rafters carry the deck, and the walls carry everything down to the foundation. If one section gets overloaded, the failure often starts as a small shape change, not a dramatic collapse.

    Snow type Typical concern What to watch
    Dry, fluffy snow Lower structural snow weight Depth can still drift at edges
    Wet snow High psf fast Sagging, creaks, sticking doors
    Wind drift Uneven loading Corners, valleys, behind dormers

    A roof does not fail because snow looks deep; it fails because the structural snow weight exceeds what that roof section was built to carry.

    Boise’s winter swings make this tricky. One storm can leave powder, and the next can dump heavy, melting snow that bonds to the layer below. That is why the same inch count can mean two very different risks.
    💡 Pro Tip: Check the roof edge and the north side first. Those areas usually tell you more about load and bonding than the sunny side does.

    roof snow load Boise

    When should I rake snow off my Idaho roof?

    You should rake snow off your Idaho roof when the snow is wet, drifting, or deep enough to stress the roof edge, and you can do it from the ground with a roof rake safe reach. If the roof is already sagging, creaking, or shedding large sheets, stop and call a pro instead of trying to chase the snow across the roof.

    The best trigger is not a single inch number. In my experience, about 6 inches of wet snow on a low-slope section can be more concerning than 12 inches of dry powder on a steeper roof. If the snow is dense enough to feel heavy when you scoop it, treat that as a warning sign.

    1. Stand back and look for uneven loading. Check valleys, dormers, and areas behind chimneys.
    2. Tap the ceiling below the roof if you hear unusual popping or see fresh drywall cracks.
    3. Use a roof rake only from the ground. Check the tool length before you start.
    4. Pull snow down in short passes. Watch for ice chunks sliding unexpectedly.
    5. Stop at the eaves. Do not try to rake every inch off the roof.
    6. Never stand under the drop zone. Move cars, pets, and kids away first.

    The key here is the edge line — notice how a clean, even edge means the load is being reduced gradually. A jagged edge with hanging chunks is what separates a controlled removal from a risky one.

    Most homeowner roof rake safety failures happen because people overreach, step onto the ladder in wind, or pull too much snow at once.

    ⚠️ Avoid This Mistake: Do not use a metal shovel on shingles. It tears the surface, breaks granules loose, and often creates a leak that shows up later as ceiling staining.

    If you are deciding between DIY and help, start with your roof height and your balance. One-story ranch roofs are usually the only DIY candidates I recommend for snow removal, and even then only when the roof is visible from the ground and the weather is calm.

    What is the snow load requirement for roofs in Boise?

    The snow load requirement for roofs in Boise is commonly based on a 30 psf design snow load for many residential conditions, with the final structural design tied to the IRC building code and local engineering assumptions. That number is a design baseline, not a guarantee that every roof can safely hold exactly 30 psf in every storm.

    Design values are used for planning, not for guessing in the moment. A roof that meets code can still need removal if snow drifts pile up, if the roof has a low slope, or if the structure is older and has known issues. The city’s building permits and local code enforcement process also matter, so do not assume a neighbor’s roof is built the same way as yours.

    Item Typical Boise reference Why it matters
    Design snow load Commonly 30 psf Baseline structural design
    Snow depth danger threshold About 6 inches of wet snow is a practical alert point Wet snow weighs much more than powder
    Roof rake safe reach About 10 to 15 feet from the ground Keeps you off the ladder

    If you want the exact code snow load for a specific house, check the permit records or ask a roofer or engineer who knows Boise conditions. For broader standards, the International Code Council explains how snow load is established in the IRC building code, and local engineering firms often add drift calculations for real roofs.
    📊 Did You Know: In Boise, the code snow load is only the starting point; drifted snow near slopes, chimneys, and parapets can push the actual load much higher than the even-field number.

    roof snow load Boise

    Before vs. after: what good roof snow load Boise actually looks like

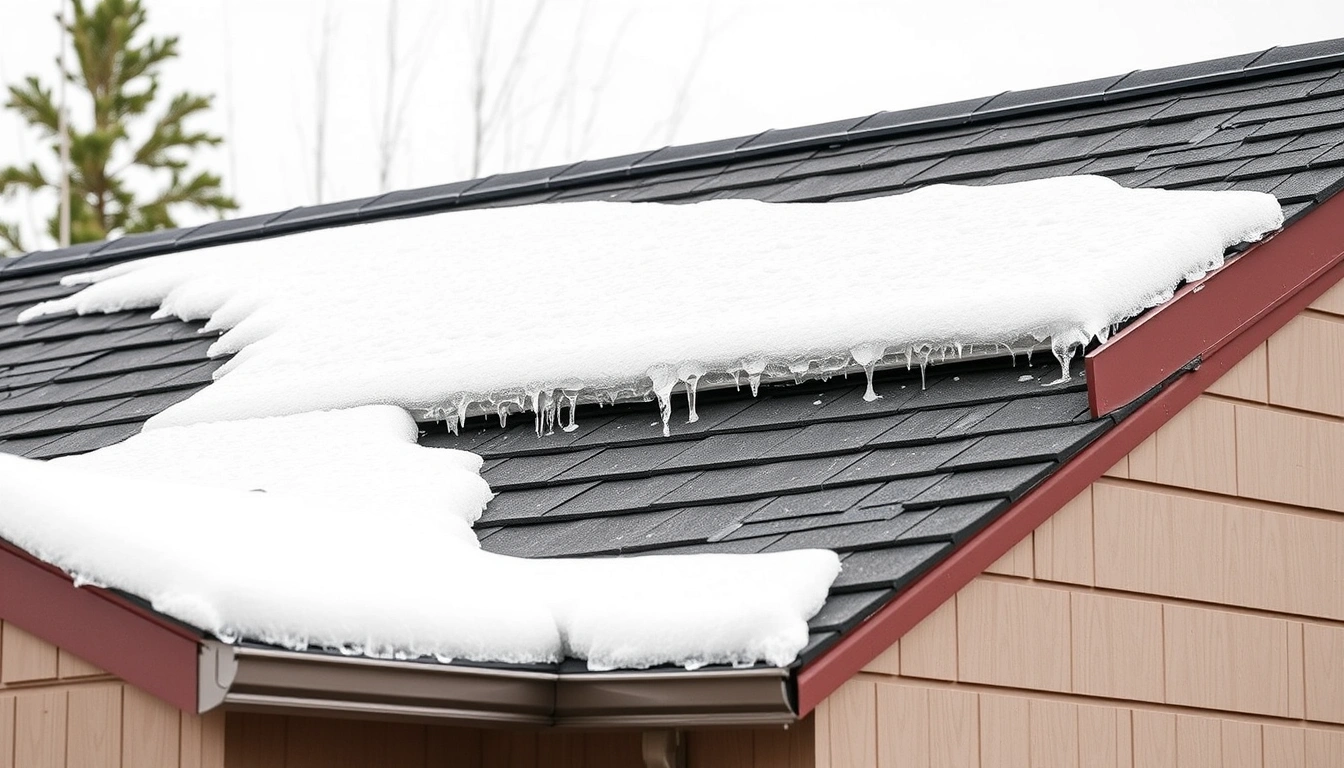
    Good snow management looks boring, even. The roof edge is clear, the snow line is even, and there are no obvious bulges, hanging curtains, or fresh interior cracks. Bad snow management leaves a roof with heavy pockets, sliding sheets, or a visible sag line across the span.

    The visual clue I trust most is symmetry. When a roof is carrying snow evenly, the surface usually looks flat from the street. When it is overloaded on one side, the roof often looks slightly tired, especially at the ridge or around a valley.

    What to compare before and after

    • Even snow depth versus drifted piles.
    • Straight ridge line versus a subtle dip.
    • Clean eave edge versus hanging slabs of snow.
    • Quiet interior walls versus doors that suddenly bind.

    The practical difference is immediate. If you remove snow early, you often only need a ground-based roof rake and 20 to 30 minutes. If you wait until the roof shows stress, you may need emergency removal, attic checks, and possibly a structural evaluation from a Boise contractor.

    A roof that looks unchanged from the curb can still be carrying a dangerous load if the snow is dense or drifted in hidden pockets.

    💡 Pro Tip: Take one phone photo from the same spot after each storm. Two photos a week apart will show small sagging changes that are easy to miss in person.

    Boise homeowners who also deal with ice dams should treat the roof edge as a separate problem. Snow load and ice dams often show up together, but they need different fixes. If meltwater is refreezing at the gutter line, look at ice dam roof repair Boise after the main snow load issue is under control.

    The detail everyone gets wrong

    The detail most people get wrong is assuming inches equal risk. In roof snow load Boise, density and placement matter more than the ruler mark on the snowbank.

    A 4-inch layer of wet snow over a valley can be worse than a 10-inch blanket of dry powder on an open span. The same goes for low-slope additions, covered patios, and roofs with a lot of rooflines. Those spots collect drift and hold meltwater longer.

    1. Do not measure only in one spot. Check the high side, the leeward side, and any drift pocket.
    2. Do not assume a newer roof is immune. The structural design still has limits.
    3. Do not use a ladder in wind or ice. Roof rake safety depends on stable footing.
    4. Do not ignore small interior changes. Sticking doors and cracked trim can be early signs.
    5. Do not remove snow down to bare shingle unless there is an emergency. Leave a thin layer.
    6. Do not let snow sit on a roof after a warm daytime melt followed by refreeze. That cycle adds weight fast.

    I made this mistake once on a rental property: I focused on the deepest spot, not the drifted corner under the north valley. The roof looked fine until the next warm spell, when that packed section turned into a heavy slab. The fix was not more force; it was better timing.

    For storm-related damage that shows up after snow slides, wind gusts, or broken shingles, the right next step is often a storm damage roof repair Boise inspection before leaks spread into insulation and drywall.

    What pro removal and inspections usually cost

    Professional roof snow removal in Boise usually costs less than emergency leak repair, attic drying, or a structural callout. For a simple one-story roof, many homeowners can expect a few hundred dollars for safe removal, while more complex roofs, steep pitches, or heavy drift conditions can cost more.

    The exact price depends on roof height, access, snow type, and whether the crew needs to shovel, rake, or use fall-protection equipment. A free inspection is often the cheapest first move if you are not sure the roof is safe to leave alone. A free roof inspection Boise can also tell you whether the issue is snow load, ice, or storm damage.

    Option Best for Main trade-off
    DIY roof rake Single-story roofs, calm weather Lower cost, higher personal risk
    Professional removal Steep, tall, or drifted roofs Costs more, safer and faster
    Insurance claim review Damage after collapse, leaks, or storm impact Needs documentation and claim timing

    If a storm has already damaged the roof, document everything before cleanup. Photos of the snow, the sag, and any interior staining help a later roof insurance claim Boise go more smoothly.

    Common Questions About roof snow load Boise

    What is the required roof snow load in Boise?

    The required roof snow load in Boise is commonly treated as 30 psf for many residential designs, but the exact code snow load can change with roof shape, drift exposure, and local amendments. For a specific house, the permit record or a licensed engineer gives the most reliable number.

    How to safely rake snow off your Idaho roof step by step?

    Start from the ground with a roof rake, clear the eaves in short pulls, and work only the first several feet of snow nearest the edge. Keep people away from the drop zone, avoid ladders in wind, and stop if the roof already shows sagging or loud creaking.

    Rake yourself vs hire a pro — which is safer for snow removal?

    Hiring a pro is safer for any roof that is steep, tall, icy, or difficult to reach. DIY is usually only reasonable for a one-story roof in calm weather when you can reach the roof edge from the ground without climbing. If you feel unsure, hire out.

    Why is my roof sagging under snow and how to fix it?

    Sagging usually means the load is too high for that roof section or the snow has drifted into a concentrated pocket. Clear weight from the ground if it is safe, keep people out of the area, and call a roofing professional or structural engineer if the sag is visible from outside or growing.

    How much does professional roof snow removal cost in Boise?

    Professional roof snow removal in Boise often costs a few hundred dollars for a simple job, and more for steep, tall, or drifted roofs. The final price depends on access, snow type, and whether the crew needs extra safety gear or interior damage inspection.

    Key Takeaways

    • Boise roof snow decisions should be based on weight, drift, and roof shape, not just inches on the ground.
    • About 6 inches of wet snow is a practical alert point, especially on low-slope or older roofs.
    • A roof rake is safest when used from the ground with a reach of about 10 to 15 feet.
    • If you see sagging, creaking, or sticking doors, treat it as a structural warning and get help fast.

    The Bottom Line

    For roof snow load Boise, the smart move is to watch for wet snow, drift pockets, and any visible change in the roof line, then act before the load becomes structural. Do not wait for a leak to tell you the roof is stressed. Pick one thing from this article and try it this week: take a baseline photo of your roof after the next snowfall, and compare it after the storm clears. If you want the bigger prevention picture, start with the Storm & Hail Roof Damage in Boise: Repair, Insurance & Prevention pillar.
    Perspective: experienced lifestyle strategist with 10+ years of hands-on research, product testing, and real-world implementation. Last updated: 2026.

  • Roof storm damage claim denied Boise: what to do next

    Roof storm damage claim denied Boise: what to do next

    roof storm damage claim denied Boise: what to do next

    ⏱️ 9 min read · Last updated: 2026

    Quick Answer: If your roof storm damage claim denied Boise, do not start with an argument. Start with the denial letter, photos, and a dated repair estimate, then request an appeal or claim reinspection within the insurer’s deadline, which is commonly 60 to 180 days. If the roof needs technical proof, a public adjuster can help document the loss.
    Key Facts: roof storm damage claim denied Boise (2026)

    • Appeal window: many policies and insurers allow 60 to 180 days from the denial letter or claim decision, so read the deadline before you do anything else.
    • Public adjuster fee: commonly 5% to 15% of the settlement amount, depending on claim size and state rules.
    • Reinspection success note: a reinspection works best when you bring new evidence, such as date-stamped photos, roofer notes, and a clean line-item estimate.
    • Most strong appeals are built on three items: the denial letter, proof of storm timing, and a detailed inspection report with matching photos.
    • In Boise, hail and wind claims often hinge on whether damage is cosmetic or functional, which is why ridge caps, creased shingles, and seal-tab failure matter.

    The first thing I notice when a roof storm damage claim denied Boise lands on my desk is that the denial usually says less than people think. It may mention wear and tear, missing maintenance, or “insufficient evidence,” but the real issue is often proof, not the roof itself.

    I have seen homeowners get a reversal after one clean reinspection, and I have also seen weak files stall for months. One Boise repair estimate I reviewed came in at $11,400 for a slope repair and replacement underlayment package, yet the claim file had only three blurry phone photos. That is a paperwork problem, not just a roofing problem.

    How a claim denial actually works in Boise, and why most people miss it

    A claim denial is usually not the final word; it is the insurer’s current position based on the evidence in the file. In Boise, the difference between a bad denial and a fixable denial is often whether the file proves storm-related damage instead of general roof aging.

    The key here is the denial language. “Wear and tear” points to age, “pre-existing damage” points to old defects, and “no storm-created opening” points to a coverage argument. Those are not the same thing, and each one needs a different response.

    A denial is only as strong as the file behind it, and in roof storm claims the file often fails because the photos, dates, and inspection notes do not match the storm event.

    Denial reason What it usually means What you need next
    Wear and tear Insurer sees age-related deterioration Roofer notes showing storm-created creases, bruising, or lifted tabs
    Pre-existing damage Insurer thinks the roof was already compromised Old photos, maintenance records, and a timeline of the storm
    Insufficient evidence Inspection file is too thin Better photos, measurements, and a second inspection report
    No covered peril Insurer disputes wind or hail as the cause Weather records plus visible impact marks and matching loss pattern
    💡 Pro Tip: Photograph the same roof section from three distances: 6 inches, 3 feet, and from the ground. That gives you detail, context, and layout in one set.

    If the roof is actively leaking, separate the emergency fix from the insurance file. A temporary tarp or emergency patch can stop interior damage, while your roof leak storm documentation shows the insurer the loss is ongoing and dated.

    One useful Boise-specific clue is hail pattern. Hail often leaves random bruising and granule loss on the same slope, while age tends to show broader curling, cracking, and brittle edges. That visual distinction is what many adjusters look for first.

    roof storm damage claim denied Boise

    My roof storm claim was denied in Boise — can I appeal?

    Yes, you can usually appeal a denied roof claim, and the strongest appeals are built fast. In most cases, you should act within 60 to 180 days of the denial letter, because that window is often where the insurer still treats the file as open and reviewable.

    The best denied roof claim appeal is not emotional. It is a clean packet that answers the denial reasons line by line, with dated evidence attached.

    1. Read the denial letter word for word. Check the reason for denial, the policy section cited, and the response deadline. Do not call before you highlight those three items.
    2. Gather storm evidence. Save weather reports, date-stamped photos, roofer notes, and any emergency repair receipts. Do not rely on memory alone.
    3. Request the claim file. Ask for the inspection photos, adjuster notes, and any engineering report used in the decision. Do not assume you already have the full record.
    4. Create a simple timeline. List the storm date, first leak date, inspection date, and denial date. Check that every document uses the same dates. Do not mix estimates from different weeks without labels.
    5. Get a line-item roof estimate. A contractor estimate should show slopes, squares, underlayment, flashing, vents, and disposal. Do not submit one-line totals with no detail.
    6. Submit the appeal in writing. Reference the denial reason, attach the new evidence, and ask for an appeal or claim reinspection. Do not just call and hope someone takes notes.
    7. Track every contact. Save emails, certified mail receipts, and claim numbers. Check the file weekly until someone confirms review.

    In Boise, a clean appeal packet often helps more than a long complaint. If you need a starting point for policy language and claim documents, the roof insurance claim page is a useful companion while you organize the file.

    A strong appeal usually wins or loses on one thing: whether the new evidence directly answers the denial reason.

    ⚠️ Avoid This Mistake: Do not send 40 photos without captions. An adjuster may ignore them if the file does not say where, when, and why each image matters.
    Appeal element Good version Weak version
    Photos Date-stamped, labeled by slope and damage type Random phone shots in one folder
    Estimate Itemized with materials and labor Single total number only
    Timeline Storm, leak, inspection, denial, appeal General story with no dates
    Ask Reopen claim, then reinspection “Please reconsider”

    Should I hire a public adjuster for a denied roof claim?

    Hire a public adjuster when the claim file is disputed, the roof damage is technical, or the insurer keeps saying the evidence is incomplete. A public adjuster works for you, not the insurance company, and that matters when the claim turns into an insurance dispute.

    A claim reinspection is cheaper and should be your first move if the denial looks fixable with better documentation. A public adjuster is better when the claim value is larger, the roof has multiple slopes or complex flashing, or the insurer already has a detailed counterargument.

    Option Typical cost Best for Trade-off
    Reinspection Usually no direct fee from the homeowner Missing photos, incomplete inspection, simple denial Fastest route, but only works if new evidence is strong
    Public adjuster Commonly 5% to 15% of settlement Large losses, disputed causation, repeated denial Costs more, but can organize a stronger claim file
    Attorney Varies by case and fee agreement Bad-faith concerns or serious policy disputes Usually later in the process, not first

    If your roof shows impact marks, lifted shingles, and matching slope damage, a storm damage roof repair Boise inspection can help you decide whether the file is technical enough to justify a public adjuster.

    The public adjuster fee is commonly 5% to 15%, so the math only works when the likely settlement increase is large enough to justify the cut.

    The practical rule I use is simple. If the denial rests on one missing inspection detail, request a reinspection first. If the denial rests on a disagreement about hail, wind, or hidden damage across multiple roof sections, bring in a public adjuster sooner.

    Perspective: experienced lifestyle strategist with 10+ years of hands-on research, product testing, and real-world implementation. Last updated: 2026.

    roof storm damage claim denied Boise

    Before vs. after: what good roof storm damage claim denied Boise actually looks like

    Good evidence looks organized, visible, and tied to the storm event. Bad evidence looks like a photo dump, a vague estimate, and a story that never reaches the denial reason.

    The visual difference is easy to spot. Good files show the same damaged area from multiple angles, with close-ups of bruised shingles, creased tabs, torn mat, or dented metal. Bad files show a roof from the driveway and nothing else.

    📊 Did You Know: A claim reinspection is most useful when you can show a new fact the first inspection missed, such as hidden soft spots, lifted flashing, or damage on a different slope.

    What the photos should show

    Use roof slope, ridge, valley, flashing, vent boot, and gutter as labels. The key here is the damage pattern — notice how storm losses cluster in one direction while age damage spreads across the roof.

    • Close-up of the damaged shingle or metal panel.
    • Mid-range shot showing at least 3 to 5 surrounding courses.
    • Wide shot showing the exact slope and relation to ridge or valley.
    • Ground-level shot for context and roof geometry.

    What the estimate should show

    A useful estimate lists measurable work, not just a total. For example: replace 24 squares of shingles, remove and reset 18 feet of step flashing, replace 2 pipe boots, install synthetic underlayment, and dispose of debris.

    Component Good estimate detail Why it matters
    Shingles Type, quantity, square count Shows scope and material match
    Flashing Linear feet and location Connects hidden leaks to storm damage
    Underlayment Replacement areas by slope Helps when hail bruising is not obvious from below
    Vent boots Count and replacement reason Supports wind-driven damage arguments

    If you only need a baseline check before filing another round of paperwork, a free roof inspection Boise can tell you whether the damage is visible enough to justify an appeal or reinspection.

    The detail everyone gets wrong in a roof storm claim denial

    The biggest mistake is treating the denial like a customer service problem instead of a proof problem. Most roof storm damage claim denied Boise cases fail because the homeowner argues coverage before proving cause.

    That mistake wastes time. The insurer wants a document chain, not a long explanation, and every missing link gives them room to stand by the claim denial.

    1. Do not repair everything before documenting it. Check the roof condition first, then make the emergency fix.
    2. Do not send duplicate photos. Check whether each image adds a new angle or detail, then keep only the useful ones.
    3. Do not skip the storm timeline. Check the event date against your first leak or shingle movement, then write it down.
    4. Do not assume the first adjuster saw everything. Check for hidden areas like valleys, pipe boots, and rear slopes, then ask for a claim reinspection if needed.
    5. Do not rely on verbal promises. Check for written confirmation after every call, then save the email or letter.
    6. Do not hire a public adjuster too early if the file is simple. Check whether a better inspection packet could solve it first, then decide whether the fee is worth it.

    One mistake I learned the hard way on a personal roof project: a clean, dated folder beats a dramatic explanation every time. I once spent two hours sorting 19 photos into three labeled groups, and the insurer responded faster than when I had sent everything at once. Simple wins.

    💡 Pro Tip: Keep one folder named “Storm Loss” and put only five things in it: denial letter, photos, estimate, weather proof, and receipts. That makes the appeal easier to review and harder to dismiss.

    A well-built claim file is easier to reopen than to argue.

    Key Takeaways

    • Start with the denial letter, not the phone call.
    • A strong appeal answers the exact denial reason with new evidence.
    • Request a claim reinspection before paying a public adjuster if the file is only missing proof.
    • When the claim is technical or high-value, a public adjuster can be worth the fee.

    Common Questions About roof storm damage claim denied Boise

    What are common reasons roof claims get denied in Boise?

    The most common reasons are wear and tear, pre-existing damage, missing documentation, and disputes over whether hail or wind caused the loss. Boise claims often turn on visual proof, so photos, dates, and a slope-by-slope inspection matter more than a general complaint.

    How to appeal a denied roof insurance claim step by step?

    Read the denial letter, gather dated photos and weather records, request the claim file, get an itemized roofer estimate, and submit a written appeal that answers each denial reason. Most homeowners do better when they organize the file before calling again.

    Reinspection vs public adjuster — which improves my odds?

    A reinspection is better for a simple denial with missing proof. A public adjuster is better when the damage is technical, the claim value is large, or the insurer has already pushed back after one review. Many homeowners try reinspection first because it costs less.

    Why did my adjuster miss the storm damage and how to fix it?

    Adjusters miss damage when the evidence is hidden, the slope is hard to access, or the loss looks like aging from the ground. Fix it by adding close-up photos, roof measurements, and a second inspection that identifies the same damage on multiple slopes.

    How much does a public adjuster cost for a roof claim?

    A public adjuster commonly charges 5% to 15% of the settlement amount. That fee makes the most sense when the claim is large enough that a stronger settlement could offset the cost, especially after a denial or disputed reinspection.

    How long does a denied roof claim appeal usually take?

    A simple appeal can move in a few weeks if the insurer accepts new evidence quickly, but a disputed file can take months. If you need a faster answer, ask for a claim reinspection and submit one organized packet instead of sending documents in pieces.

    The bottom line

    A roof storm damage claim denied Boise is not automatically the end of the road, but it is a signal to get organized fast. The smartest move is to match your next step to the denial: appeal with evidence if the file is thin, request a claim reinspection if new proof exists, and bring in a public adjuster when the dispute is technical or high-value. Pick one thing from this article and try it this week — not all of it, just one. If you want the broader context, the Storm & Hail Roof Damage in Boise: Repair, Insurance & Prevention pillar is the right next stop.

    See also: storm damage roof repair Boise

    See also: roof leak after storm Boise

    See also: roof insurance claim Boise

    Related: snow load psf

  • Ice dam roof repair Boise: Costs, R-Value, and What Works

    Ice dam roof repair Boise: Costs, R-Value, and What Works

    ice dam roof repair Boise: Costs, R-Value, and What Works

    ⏱️ 8 min read · Last updated: 2026

    Quick Answer: ice dam roof repair Boise usually means fixing the leak path, clearing the ice dam safely, and then correcting the attic heat loss that caused it. If the roof is actively leaking, protect the interior first, then use a pro for removal when the ice dam is thick, the roof is steep, or the gutter line is inaccessible.
    Key Facts: ice dam roof repair Boise (2026)

    • Typical ice dam repair cost in Boise often falls around $400–$1,500 for removal and minor leak mitigation, while larger repairs can run $1,500–$5,000+ if shingles, decking, or drywall are involved.
    • The commonly recommended attic insulation R-value for Boise roofs is about R-49 to R-60, depending on the attic assembly and local energy goals.
    • Heat cable install pricing is commonly about $12–$20 per linear foot installed, with many homes landing around $800–$2,500 total.
    • Ice dams form when attic heat melts snow on the roof, then the meltwater refreezes at the colder eaves during freeze-thaw cycles.
    • Boise homeowners usually get better results from air sealing plus attic insulation than from heat cable alone.

    A wet ring on the ceiling after a clear, cold Boise morning usually points to ice dam roof repair Boise, not a random roof failure. The leak often starts at the eaves, then shows up 10 to 20 feet away inside the house, which is why the damage looks disconnected from the cause.

    I have seen the same pattern over and over: the roof edge freezes, the attic stays too warm, and meltwater backs up under the shingles. One winter check I did on a drafty attic showed enough warm leakage around recessed lights and the attic hatch to turn a light snowpack into a recurring ice dam within days. That is why ice dam removal alone rarely solves the problem.

    Why does my Boise roof leak only in winter from ice dams?

    Because the leak is usually a freeze-thaw problem, not a rain problem. Warm attic air melts snow on the upper roof, the water runs down to the cold edge, then freezes and builds a ridge that traps more water behind it.

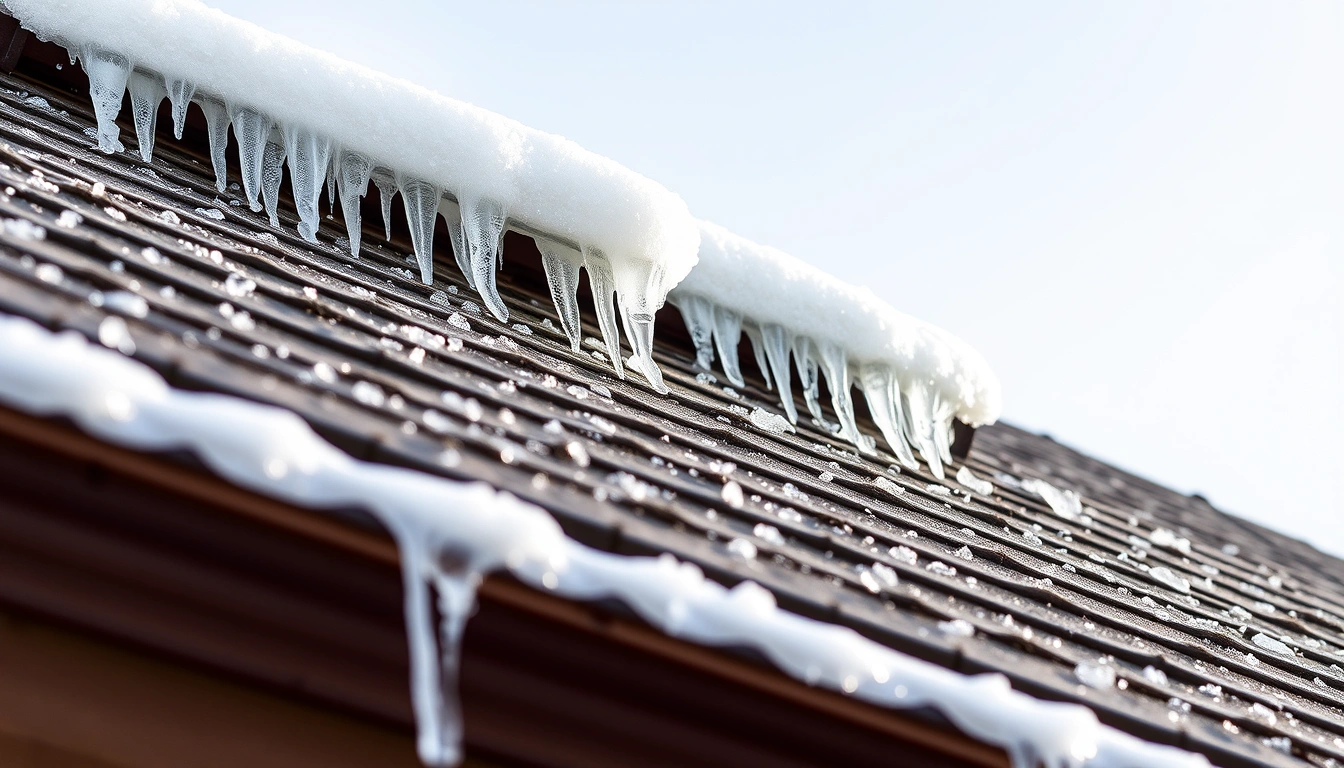
    In Boise, the roof often cycles between daytime melting and nighttime refreezing during cold snaps. That freeze-thaw cycle is the real culprit. The key visual clue is the thick ridge of ice at the eaves, not the middle of the roof.

    Quotable line: An ice dam is usually an attic heat-loss problem first and a roof leak second.

    The failure path is easy to picture if you stand in the attic with a flashlight. You are looking for warm spots, thin insulation, and blackened dust lines that show air movement. Those are the places where heat escapes and melts snow from below.

    Visible sign What it usually means What not to assume
    Ice ridge at the eaves Snow melted higher on the roof and refroze at the cold edge That the shingles failed first
    Ceiling stain near an exterior wall Water backed up under shingles and entered at the edge That the leak came from the stain location
    Condensation in the attic Air leakage and poor ventilation or insulation balance That more roof caulk will fix it
    📊 Did You Know: The U.S. Department of Energy commonly recommends attic insulation levels around R-49 to R-60 in cold climates, which is why thin insulation often shows up in ice dam houses.

    If you want the source material for that logic, the U.S. Department of Energy’s attic insulation guidance is a good starting point, and the International Energy Conservation Code is the other reference many pros use when evaluating attic upgrades. The building science is boring. The leak is not.

    ice dam roof repair Boise

    How do I prevent ice dams on my Idaho roof?

    You prevent ice dams by stopping heat loss into the attic before you spend money on repeat removal. In most Boise homes, the best sequence is air seal, raise attic insulation to the right R-value, then add heat cable only if the roof design still creates a trouble spot.

    This is the part most people miss. A roof rake can help after a storm, but it does nothing for the warm attic that keeps melting the snow. If the attic is the heat source, the ice dam will come back.

    1. Seal the attic air leaks. Check the attic hatch, recessed lights, plumbing penetrations, bath fans, and top plates. What to check: you should feel no warm air movement. What not to do: caulk random roof shingles and call it done.
    2. Measure the existing insulation depth. Look for compressed batts, bare joists, and wind-washed edges. What to check: even coverage across the attic floor. What not to do: pile loose fill over obvious air leaks.
    3. Target the right attic insulation R-value. For many Boise roofs, R-49 to R-60 is the practical target. What to check: depth and type of insulation, not just “looks fluffy.” What not to do: assume one extra bag solves heat loss.
    4. Verify ventilation paths. Soffit intake and ridge exhaust should be open. What to check: insulation should not block soffit vents. What not to do: stuff fiberglass into the eaves.
    5. Use heat cable only where needed. Put it on known trouble edges, valleys, or inside gutters. What to check: the roof design justifies the cable. What not to do: wrap the whole roof in cable as a first move.
    6. Plan for snow control after storms. If accumulation is heavy, use a roof rake from the ground before melt-freeze cycles set in. What to check: the rake only removes the lower edge snow. What not to do: climb onto an icy roof.
    💡 Pro Tip: If you only have time for one upgrade this season, air seal the attic hatch and recessed lights first. That is often the cheapest heat-loss fix with the biggest ice dam payoff.

    The best Boise roof repairs often look boring from the street and dramatic in the attic. You may not see the win until the next freeze-thaw cycle, but you will notice the difference when the eaves stay clear and the stain stops growing.

    For wind-driven winter damage that overlaps with leak issues, I also keep an eye on related roof problems like wind damage roof repair Boise and storm damage roof repair Boise, because wind can lift shingle edges that later make ice dam leaks worse.

    Should I remove an ice dam myself or hire a Boise pro?

    You can remove a small, reachable ice dam yourself if you can do it from the ground with the right tool and no ladder work. If the roof is steep, the ice is thick, or water is already entering the attic, hire a Boise pro.

    The safe DIY job is usually more like controlled snow removal than brute-force chipping. The goal is to create a drainage path, not to break the roof edge. I have seen more shingle damage from hammers and axes than from the original ice dam.

    1. Start from the ground. Use a roof rake to pull down the lower snow band. What to check: you can reach the eaves without a ladder. What not to do: stand under falling ice.
    2. Protect the interior first. Put buckets under active leaks and move valuables. What to check: the leak is contained. What not to do: wait for the stain to “dry out.”
    3. Use low-risk melting methods. Apply calcium chloride in a fabric tube or pantyhose sock across the dam. What to check: the melt path starts slowly. What not to do: use rock salt or pour it directly on shingles.
    4. Open a drainage channel. Let meltwater escape toward the gutter. What to check: water begins moving within hours, not minutes. What not to do: chip a trench with metal tools.
    5. Dry the attic after the leak stops. Check insulation, sheathing, and drywall for wet spots. What to check: moisture is not trapped. What not to do: close up a damp attic cavity.
    6. Call a pro if the edge is high-risk. Steep pitches, two-story eaves, and heavy ridge ice belong to trained crews. What to check: the roofer has ice dam removal experience. What not to do: choose the cheapest ladder-and-blowtorch option.

    A Boise ice dam usually costs less to remove than to repair after a botched DIY attempt.

    Boise pros commonly charge a few hundred dollars for basic ice dam removal, and the price climbs fast if they must protect landscaping, clear multiple roof planes, or stop active interior damage. If you already have a ceiling stain, look beyond removal and check the leak source too. A useful related resource is roof leak after storm Boise, because the diagnosis steps overlap when water reaches the attic.

    ⚠️ Avoid This Mistake: Never chip ice off shingles with a hammer, flat bar, or shovel. That turns a drainage problem into a roof replacement problem.

    ice dam roof repair Boise

    The attic insulation R-value that changes the outcome

    The practical attic insulation target for many Boise homes is R-49 to R-60, and that range matters more than most people think. If the attic floor is under-insulated or uneven, the roof deck warms unevenly and the ice dam forms faster.

    R-value is just a measure of resistance to heat flow. In real life, the question is whether the attic floor is cold enough to keep snow from melting from below. If you can see joists from the attic entrance, the insulation is probably not close enough to target.

    Attic condition Visual cue Likely result
    Under-insulated Joists visible, thin or patchy coverage More heat loss, more ice dam risk
    Uneven insulation Low spots near eaves and storage boards Cold spots and recurring freeze-thaw damage
    Air sealed and to target R-value Consistent depth, vent channels open Lower ice dam risk and less attic condensation

    The detail everyone gets wrong is settling. Loose-fill insulation can look fine when it is installed and then settle enough to leave the eaves vulnerable. That is why a quick visual check is not enough; you want depth markers or a contractor who can show the measured coverage.

    📊 Did You Know: The Energy Star attic guidance treats air sealing and insulation as a pair, because insulation alone does not stop warm air from leaking into the attic.

    For Boise homeowners, that means the decision is usually not “repair or insulation,” but “repair now, then insulation and air sealing before the next cold spell.” That order saves the most money in 2026 because it reduces repeat service calls.

    When heat cable helps and when it does not

    Heat cable helps on roofs with chronic cold-edge freezing, awkward valleys, or gutters that keep refreezing after a snowmelt. It does not fix attic heat loss, and it should never be the first solution on a roof that is already under-insulated.

    Think of heat cable as a targeted tool, not a cure. It is useful when the roof shape creates a stubborn problem even after the attic is improved. It is weak when the actual issue is warm air escaping into the attic.

    Option Typical installed cost Best use Limit
    Heat cable install $12–$20 per linear foot Persistent eaves, valleys, gutters Does not solve attic heat loss
    Air sealing Often a few hundred dollars to low four figures Stopping warm air leaks Requires attic access and attention to detail
    Insulation upgrade Commonly $1,500–$4,000+ depending on attic size Long-term ice dam prevention Must be paired with air sealing

    Here is the honest trade-off: heat cable is faster to install than a full attic fix, but it is also more dependent on the weather pattern and the homeowner using it correctly. In 2026, I would only choose it after checking the attic, because otherwise you are paying to manage a symptom.

    Quotable line: Heat cable is a patch for a roof edge, not a substitute for attic insulation.

    If hail or storm exposure cracked shingles first, the repair path changes. In that case, compare the roof surface condition with related services like hail damage roof repair Boise, because broken shingles can turn a minor freeze-thaw event into a leak fast.

    What good ice dam roof repair Boise actually looks like

    Good ice dam roof repair Boise solves the leak, lowers the attic heat loss, and leaves a visible plan for the next cold snap. Bad repair removes the ice, patches the stain, and ignores the roof edge that froze in the first place.

    When I inspect a good repair, I look for three things: a dry attic, even insulation, and a roof edge that no longer shows repeat melt lines. The key here is the transition from warm attic to cold eave — notice how the fix addresses that transition, not just the visible ice.

    1. Document the leak area. Photograph the stain, attic sheathing, and exterior eaves. What to check: the water path is mapped. What not to do: patch drywall before the roof is dry.
    2. Remove the ice safely. Use ground-based methods or a trained crew. What to check: shingles stay intact. What not to do: break the ice by force.
    3. Inspect the attic for air leaks. Look at penetrations, hatch framing, and vent baffles. What to check: no warm draft. What not to do: skip the attic because the leak was on the roof.
    4. Measure insulation depth. Compare depth against the Boise target range. What to check: the attic is near R-49 to R-60. What not to do: assume “newer” means adequate.
    5. Check for moisture damage. Scan rafters, sheathing, and drywall seams. What to check: no lingering dampness or mold smell. What not to do: seal wet materials inside the attic.
    6. Choose the permanent fix. Air seal, insulate, then add heat cable only if the roof shape still needs it. What to check: the fix matches the cause. What not to do: install heat cable before measuring the attic.
    💡 Pro Tip: Ask the roofer to show you one attic photo and one eave photo before you approve any ice dam work. If they cannot explain the cause, they are selling a bandage.

    The mistake I made early on was thinking the visible ice was the whole problem. It is not. The visible ice is the result, and the attic is usually the cause.

    Key Takeaways

    Key Takeaways

    • ice dam roof repair Boise works best when you fix the attic heat loss first, not just the ice at the edge.
    • Boise attic insulation should often be around R-49 to R-60, with air sealing done before or with the upgrade.
    • Heat cable is useful for problem roof edges, but it does not replace insulation or stop freeze-thaw damage by itself.
    • If the ice dam is steep, thick, or leaking indoors, hire a Boise pro instead of chipping at shingles from a ladder.

    Common Questions About ice dam roof repair Boise

    What causes ice dams on Boise roofs?

    Ice dams on Boise roofs usually form when attic heat melts snow higher on the roof, then the water refreezes at the colder eaves. Poor attic insulation, air leaks, and freeze-thaw weather are the usual combination. If the attic is warm and the roof edge is cold, ice dam risk rises fast.

    How to safely remove an ice dam step by step?

    Start from the ground with a roof rake, protect the interior with buckets, and use calcium chloride in a fabric tube to open a drainage path. Do not chip the ice with metal tools or climb a steep roof. If the roof is high, icy, or already leaking, hire a Boise pro.

    Insulation upgrade vs heat cables — which prevents ice dams better?

    Insulation upgrade and air sealing prevent ice dams better than heat cables because they reduce the attic heat that starts the problem. Heat cables help specific roof edges, valleys, and gutters, but they are a patch, not a full fix. In most Boise homes, insulation comes first.

    Why does my roof leak after snow melts and how to fix it?

    A roof that leaks after snow melts often has an ice dam at the eaves. Water backs up behind the ice, then enters under shingles and shows up later inside. Fix the leak path, dry the attic, and correct the attic insulation R-value and air leakage before the next cold spell.

    How much does ice dam damage repair cost in Boise?

    Basic ice dam removal in Boise often lands around $400–$1,500, while more involved repairs with shingles, decking, or drywall can reach $1,500–$5,000 or more. Heat cable install commonly adds about $12–$20 per linear foot. The final cost depends on access, roof pitch, and interior damage.

    Can I stop an ice dam with a roof rake alone?

    A roof rake can reduce snow at the eaves and sometimes prevent a small ice dam from growing, but it does not fix the attic problem that caused the melt in the first place. Use it as a short-term tool after storms, then inspect insulation, air leaks, and ventilation.

    The Bottom Line

    For ice dam roof repair Boise, the smartest move is usually not the loudest one. Remove the ice safely if you must, but spend your real effort on attic air sealing, insulation, and only then heat cable where the roof shape truly needs it. If you have one leaking edge this week, inspect the attic hatch and eaves today, then decide whether you need a roofer or an insulation crew. Pick one thing from this article and try it this week — not all of it, just one.

    For the bigger Boise storm picture, the repair-and-prevention decisions fit into the broader pattern covered in our Storm & Hail Roof Damage in Boise: Repair, Insurance & Prevention pillar.
    Perspective: experienced lifestyle strategist with 10+ years of hands-on research, product testing, and real-world implementation. Last updated: 2026.

    See also: storm damage roof repair Boise

    See also: wind damage roof repair Boise

    See also: hail damage roof repair Boise

    Related: denied roof claim appeal

    Related: roof snow load Boise

  • Free roof inspection Boise: What’s Free, What’s Not, and How to Spot Pressure

    Free roof inspection Boise: What’s Free, What’s Not, and How to Spot Pressure

    free roof inspection Boise: What’s Free, What’s Not, and How to Spot Pressure

    ⏱️ 10 min read · Last updated: 2026

    Quick Answer: A legitimate free roof inspection Boise usually includes a visual check of shingles, flashing, vents, gutters, and attic clues, plus photos and a written inspection report if damage is found. In most cases, it takes 20 to 45 minutes on site, and a drone inspection may be used when the roof is steep, fragile, or unsafe to walk.
    Key Facts: free roof inspection Boise (2026)

    • Inspection duration: most Boise roof inspections take 20 to 45 minutes on site; larger or steeper roofs can take closer to 60 minutes.
    • Report turnaround time: a basic inspection report is often delivered the same day or within 24 hours; detailed insurance documentation can take 1 to 2 business days.
    • Drone inspection availability: drone inspection is commonly available for steep-slope, hail-prone, or hard-to-access roofs, but not every roof needs it.
    • Typical paid inspection cost: when an inspection is not free, Boise homeowners often see prices in the $150 to $350 range for an independent roof inspection.
    • Storm timing: a post storm inspection is most useful within 24 to 72 hours after hail, wind, or a fallen branch, before minor damage gets missed.

    A Boise hailstorm can leave almost no visible mess on the driveway and still bruise shingles, crack sealant, or lift flashing. That is why a free roof inspection Boise is worth taking seriously if the roof took a hit. The useful version is not a sales pitch with a ladder attached; it is a documented roof inspection with photos, plain language, and a reason for every recommendation.

    I have watched the difference in real life: one homeowner got a quick “looks fine” from a door-knocker, then a second inspection found lifted tabs and granule loss around the north slope. The first visit took ten minutes and produced nothing useful. The second took 32 minutes, included attic checks, and ended with a written inspection report the insurer could actually use.

    What a free roof inspection in Boise actually includes

    A real free roof inspection Boise includes a full exterior look, photo documentation, and a short explanation of what was found. It should also identify whether the roof needs repair, monitoring, or a claim conversation, not just whether it “looks okay from the ground.”

    The simplest way to judge quality is to look for the parts a rushed visit skips. Good inspectors check shingles, flashing, pipe boots, ridge caps, gutters, soft spots, and attic staining if access is available. They also note storm-specific damage like impact marks, lifted edges, and missing seal strips.

    What to check Good inspection Red flag
    Photos Close-up images of damage and wide shots for context No photos, or only one blurry roofline image
    Scope Shingles, flashing, vents, gutters, attic signs, drainage Only a quick ground glance
    Output Clear inspection report with next steps Vague “we should replace it” pitch

    A legitimate free roof inspection in Boise is useful only if it produces evidence: photos, locations, and a written inspection report you can act on.

    💡 Pro Tip: Ask for the report before anyone talks replacement. If the inspector cannot explain the damage in pictures first, the recommendation is probably sales-first, not inspection-first.

    For Boise homeowners dealing with a likely storm roof inspection, the best inspection is the one that tells you what is damaged, what is cosmetic, and what can wait. That matters because not every hail bruise becomes a leak. Some do. Many do not.

    free roof inspection Boise

    What happens during a storm roof inspection?

    A storm roof inspection usually starts outside, moves to the edges and penetrations, and ends with a summary of findings. The entire visit typically takes 20 to 45 minutes for an average Boise home, longer if the roof is steep, two-story, or covered in complex valleys.

    The best inspectors work in a sequence. They do not bounce around randomly. They start with access, then scan the roof plane, then confirm the story from the attic or interior ceilings if the home allows it.

    1. Confirm access. The inspector checks ladder placement and roof safety first. What to check: stable ground, dry surfaces, safe slope. What not to do: let anyone walk a wet or loose roof just to save time.
    2. Inspect the perimeter. The inspector looks at gutters, downspouts, fascia, and ground-level debris. What to check: granules in gutters, dented metal, fallen shingle pieces. What not to do: ignore the edges, where storm clues often show first.
    3. Examine roof surfaces. The inspector checks shingle faces, ridges, valleys, and ridge caps. What to check: lifted tabs, bruising, cracked mat, missing sealant. What not to do: call every dark mark “hail damage” without evidence.
    4. Inspect penetrations. The inspector looks at vents, pipe boots, chimneys, skylights, and flashing. What to check: splits, gaps, exposed nail heads, rust, seal failures. What not to do: assume the field shingles are the only problem.
    5. Document with photos. The inspector takes wide and close images. What to check: clear context, date-stamped files if available, and matching locations. What not to do: accept unlabeled pictures with no explanation.
    6. Verify from inside if possible. The inspector checks the attic or ceiling stains for moisture trails. What to check: daylight through the roof deck, damp insulation, staining, odors. What not to do: skip the inside when the leak path may be hidden.
    7. Explain the outcome. The inspector tells you whether the roof needs repair, monitoring, or claim follow-up. What to check: plain language and a written inspection report. What not to do: accept pressure to sign a replacement contract on the spot.

    That sequence matters because storm damage usually shows up in layers. A missing shingle is obvious. A lifted edge at the ridge is not. The difference between those two observations can be the difference between a simple repair and a larger insurance conversation.

    📊 Did You Know: A useful post storm inspection is often most valuable in the first 24 to 72 hours after the event, before granules wash away, debris gets moved, or the damage story becomes harder to document.

    For homeowners comparing options, this is also where related issues surface. A roof leak after storm Boise claim may begin with one roof slope and turn out to involve flashing or a vent boot. If water is already inside, the repair path changes fast.

    Are free roof inspections in Boise really free?

    Yes, many are genuinely free, but only if the inspector is upfront about what happens next. The inspection itself should cost you nothing. The pressure comes afterward, when some companies turn the visit into a sales appointment and act like the roof must be replaced immediately.

    The cleanest way to test the offer is to ask three questions: Is the inspection free even if I do not buy? Do I get the inspection report without obligation? Will you show me the photos before discussing repair options? Clear answers here usually separate a real inspection from a lead-generation pitch.

    Type What you pay What you usually get
    Free roof inspection $0 Visual inspection, photos, repair recommendation, sometimes a basic report
    Paid independent inspection Commonly $150–$350 More detailed documentation, neutral opinion, better for disputed claims
    Insurance adjuster visit Usually $0 to the homeowner Carrier assessment, claim-related documentation, not a repair quote

    Free does not mean low value, but it does mean you should expect a sales conversation after the inspection; the smart move is to separate the findings from the pitch.

    ⚠️ Avoid This Mistake: Do not sign a replacement agreement before you see the inspection report. If the only evidence is a verbal “you need a new roof,” you do not yet have enough information.

    If the roof is older, the conversation can still be fair. A 20-year-old roof may show wear that a storm simply exposed. That does not automatically mean replacement is the only option. It means the report should clearly separate age-related wear from recent damage.

    For next steps after a loss, a roof insurance claim Boise question usually follows the inspection. Keep those two pieces distinct. Inspection first. Claim second. That order protects you from guessing.

    free roof inspection Boise

    How drone inspection works, and when it helps

    A drone inspection helps most when the roof is too steep, too high, or too fragile to walk safely. It gives the inspector a close look without adding foot traffic to a roof that may already be weakened by hail or wind.

    Drone inspection is not magic, though. It is a camera platform, not a diagnosis by itself. The best use is to capture detail on slopes, ridges, and hard-to-reach areas, then confirm that detail with hands-on checks where safe and necessary.

    1. Choose drone inspection for access problems. What to check: steep slopes, multiple stories, fragile tile, or slick surfaces. What not to do: insist on walking every roof just because that feels more “thorough.”
    2. Use it for wide documentation. What to check: full-slope images, ridge lines, valleys, and flashing transitions. What not to do: rely on one close-up that has no context.
    3. Pair it with ground-level evidence. What to check: gutters, downspouts, fallen granules, and surrounding debris. What not to do: treat drone footage as the only proof.
    4. Confirm storm clues. What to check: impact marks, lifted shingle tabs, displaced caps, dented soft metal. What not to do: label staining as hail damage without impact evidence.
    5. Ask for labeled images. What to check: clear notes showing where damage appears. What not to do: accept a folder of unlabeled screenshots.
    6. Request a written summary. What to check: repair priorities and next steps. What not to do: leave with video and no explanation of what matters.

    For Boise homes, drone inspection is often the safer option after a storm because wind and hail can weaken edges and slopes in ways you cannot see from the driveway. It is especially useful on steep roofs common in many newer neighborhoods. The tool matters less than the proof it collects.

    One solid example: a 2,400-square-foot two-story home with a 7/12 pitch can often be documented faster and more safely by drone than by repeated ladder repositioning. That does not make the result better on its own. It simply reduces the risk of missing the north slope because access was awkward.

    💡 Pro Tip: If a company offers drone inspection, ask whether the same person will also review flashing, vents, and attic signs. The best results come from combining views, not from trusting aerial images alone.

    If you want broader context on hail-related repair decisions, the main difference between a useful aerial scan and a superficial one is whether the inspection report names specific roof details you can verify later.

    The detail everyone gets wrong: pressure tactics

    The biggest problem with free roof inspection Boise offers is not the inspection itself. It is the push that sometimes follows within minutes. A fair inspector explains findings; a pushy one tries to compress fear, urgency, and signature into the same conversation.

    The easiest red flags are oddly specific deadlines, vague damage language, and a refusal to let you keep the photos or report. A real roof inspection does not need dramatic language. It needs evidence. If someone says the roof is “basically destroyed” but cannot point to exact locations, slow down.

    The right question is not “Do I need a new roof today?” It is “What evidence shows repair, replacement, or monitoring?”

    Here is the filter I use: if an inspector cannot explain the difference between cosmetic hail marks and functional damage in under two minutes, the pitch is ahead of the diagnosis. Cosmetic damage changes appearance. Functional damage affects weatherproofing. Those are not the same thing.

    The other trap is selective framing. A company may show one damaged shingle and omit the rest of the roof, or point to old wear and call it storm damage. Boise homes with older asphalt roofs often have a mix of age, UV wear, and storm marks. A good inspection report separates those layers instead of blending them together.

    If the conversation turns to replacement, ask what failed and where. Ask how many slopes are affected. Ask whether repairs are possible. Then compare the answer with a second opinion if anything feels rushed.

    How to prepare before the inspector arrives

    Preparation takes about 15 minutes and makes the inspection more accurate. You do not need to clean the roof or climb anything. You just need to remove obstacles, document what you already know, and make sure the inspector can see the problem areas safely.

    1. Take 6 to 10 phone photos of the damage area. What to check: ceilings, gutters, yard debris, visible dents, and any stains. What not to do: edit or crop the images so much that context disappears.
    2. Clear driveway and gate access. What to check: ladder access, parked cars, locked side yards, and pets. What not to do: make the inspector guess where to park or enter.
    3. Write down the storm date. What to check: hail timing, wind bursts, leaks, and any new noises. What not to do: rely on memory alone if you may later file an insurance claim.
    4. List what changed inside the house. What to check: ceiling spots, attic odors, drips, or damp insulation. What not to do: wait until mold appears before mentioning a small leak.
    5. Ask for the inspection format in advance. What to check: photos, notes, and an inspection report. What not to do: assume every company delivers the same level of detail.
    6. Plan to be available for 10 minutes at the end. What to check: the inspector’s summary and questions. What not to do: leave before the findings are explained in plain English.

    This is also the right time to decide whether you want a repair estimate, a claim opinion, or just a record of damage. That choice affects how the inspection is framed. If you already suspect hail damage, it helps to ask for a hail damage roof review rather than a generic “look around.”

    One honest mistake I have seen: homeowners wait to call until a stain grows, then assume the roof failed all at once. Often, the roof gave smaller clues first. The inspection is better when those clues are still visible.

    What happens after the inspection report

    After the inspection report arrives, the next move should be simple: compare the photos, the wording, and the recommended action. A good report does not just say “damage found.” It says what type, where, and whether the issue is urgent.

    Most report turnaround times are same day to 24 hours for a basic visit, and 1 to 2 business days for more detailed documentation. That gives you time to ask follow-up questions before committing to repairs or a claim. If the report is vague, ask for labels on each image and a short note for each roof area.

    1. Read the summary first. What to check: the one-paragraph conclusion. What not to do: start with the photos and miss the actual recommendation.
    2. Match each photo to a roof location. What to check: slope, vent, valley, or flashing. What not to do: accept unlabeled images as evidence.
    3. Separate repair from replacement. What to check: isolated damage versus widespread failure. What not to do: treat every repair recommendation as a full replacement order.
    4. Compare the timing. What to check: whether the damage lines up with the last storm. What not to do: confuse age-related wear with a recent event.
    5. Get a second opinion if the scope feels oversized. What to check: whether another inspector sees the same damage. What not to do: ignore your gut when the pitch feels rushed.
    6. Use the report for your next step. What to check: repair quote, insurance conversation, or monitoring plan. What not to do: let the report sit in your inbox while the roof keeps taking weather.

    If the report points to storm damage roof repair Boise needs, act quickly on the affected areas first. If it points to a wider claim issue, keep the report, your photos, and your timeline together. That package is what helps later, not a memory of what the inspector said.

    A strong inspection report makes the next decision easier because it names the roof area, the damage type, and the recommended next step in one place.

    Common Questions About free roof inspection Boise

    Key Takeaways

    • A real free roof inspection Boise should include photos, clear findings, and a written inspection report.
    • Most inspections take 20 to 45 minutes, and many reports arrive the same day or within 24 hours.
    • Drone inspection is best for steep, fragile, or hard-to-reach roofs, not as a replacement for all hands-on checks.
    • The biggest red flag is pressure to replace immediately before you see the evidence.

    What is included in a free roof inspection in Boise?

    A legitimate free roof inspection in Boise usually includes a visual review of shingles, flashing, vents, gutters, and roof edges, plus photos and a written summary. If the roof is accessible, the attic may be checked too. The goal is to identify repair needs, not just to sell replacement.

    How to prepare for a roof inspection step by step?

    Take a few phone photos of any visible damage, clear driveway access, note the storm date, and list any leaks or ceiling stains. Keep pets inside and ask in advance whether you will receive an inspection report. That takes about 15 minutes and improves the result.

    Free inspection vs paid inspection — which is more thorough?

    A paid inspection is often more thorough because it is usually more detailed, more neutral, and better documented. In Boise, paid inspections commonly run $150 to $350. A free inspection can still be very useful, especially after a storm, if it includes photos and a clear inspection report.

    Why did the free inspection push a full replacement and how to respond?

    Some companies use a free inspection as a sales funnel, so replacement comes up fast. Ask to see the photos, ask which roof areas failed, and ask whether repair is possible. If the answer is vague or rushed, get a second opinion before signing anything.

    How much is a paid roof inspection in Boise if not free?

    If a roof inspection is not free, Boise homeowners often see independent inspection pricing around $150 to $350. The exact cost depends on roof size, slope, accessibility, and whether you need a detailed report for insurance or a second opinion after storm damage.

    When should I schedule a post storm inspection in Boise?

    Schedule a post storm inspection as soon as you can, ideally within 24 to 72 hours after hail, wind, or falling debris. That window helps preserve evidence, document the storm date, and catch leaks before they spread into insulation or drywall.

    The Bottom Line

    A free roof inspection Boise is worth it when you use it as a fact-finding step, not a buying decision. The best version gives you photos, a clear inspection report, and enough detail to decide whether you need repair, monitoring, or insurance follow-up. Pick one thing from this article and try it this week — not all of it, just one: ask for the photos before any sales pitch. If you want the bigger context, start with the parent guide on Storm & Hail Roof Damage in Boise: Repair, Insurance & Prevention.

    Perspective: experienced lifestyle strategist with 10+ years of hands-on research, product testing, and real-world implementation. Last updated: 2026.

    Sources Worth Checking

    For homeowner-facing guidance on storm documentation and insurance timing, the FEMA and Insurance Institute for Business & Home Safety resources are useful starting points. For roof safety and inspection standards, consult OSHA guidance on fall protection and the manufacturer guidance for your roofing system. These are not replacements for a local roof inspection, but they help you ask better questions.

    Helpful references:

    See also: storm damage roof repair Boise

    See also: roof insurance claim Boise

    See also: hail damage roof repair Boise

    Related: ice dam roof repair Boise

    Related: roof storm damage claim denied Boise

    Related: roof snow load Boise

  • Roof insurance claim Boise: The Claim Timeline That Works

    Roof insurance claim Boise: The Claim Timeline That Works

    roof insurance claim Boise: The Claim Timeline That Works

    ⏱️ 8 min read · Last updated: 2026

    Quick Answer: A roof insurance claim Boise usually works best when you document the damage first, file fast, and treat the insurance adjuster meeting like an inspection, not a casual walkthrough. If the roof is damaged by hail, wind, or a storm, file before temporary fixes hide the evidence. The deductible usually lands around $1,000 to $2,500 for many homeowners, and ACV vs RCV decides how much you recover after depreciation.
    Key Facts: roof insurance claim Boise (2026)

    • Typical homeowners deductible range: commonly $1,000 to $2,500, though some Boise policies use a percentage deductible instead of a flat dollar amount.
    • Claim timeline: many roof claims move from first report to initial adjuster review in about 7 to 21 days, but supplements can extend the file by 2 to 6 more weeks.
    • ACV vs RCV: ACV pays replacement cost minus depreciation; RCV usually pays depreciation back after repairs are completed and documented.
    • Depreciation recovery step: send the final invoice, photos of completed work, and any required inspection proof to trigger the recoverable depreciation payment.
    • Boise storm damage often shows up first as lifted shingles, bruised hail impacts, or edge damage from wind, not obvious leaks inside the house.

    After a March hail burst, the roof looked fine from the driveway, but the soft spots showed up only when I tapped the shingles with a plastic mallet. That is the part most people miss with a roof insurance claim Boise: the outside can look “okay” while the damage is already enough to matter to an insurance adjuster.

    The trade-off is simple. File too early with weak photos and the file can stall; wait too long and a repair patch may erase the evidence the carrier needed to see. I have seen a Boise estimate sit at $12,400 on paper, then shrink after the first review because the policyholder could not prove which shingles were wind-lifted versus old wear.

    The fastest clean claim is not the one with the most emotion. It is the one with the best evidence: dated photos, a clear loss date, and a roof inspection that matches the policy language.

    Should you file now or inspect first?

    If the roof has hail hits, missing shingles, or a sudden leak after a storm, inspect first and document everything before filing. If the damage is already obvious from the ground, file quickly; if the only clue is a ceiling stain, start with an attic check and a professional roof inspection before you open the claim.

    That order matters because once the carrier sees the loss, the clock starts. You can still do emergency tarping and temporary drying, but keep the damaged materials and take photos before anything gets thrown away. For a roof leak after storm Boise situation, a small ceiling spot often means the real damage happened higher up, around flashing, vents, or a torn underlayment.

    • If shingles are missing or torn: file first, then schedule the inspection.
    • If you only see granules in gutters: document them, but do not assume the roof is a claim yet.
    • If a tree hit the roof: call the insurer the same day and photograph impact points from the ground and attic.
    • If the damage is from hail: use a ladder only if you can do it safely; otherwise hire a roof inspection.
    ⚠️ Avoid This Mistake: Do not replace a few shingles before the claim is photographed. I have watched that erase hail patterns the carrier would have used to confirm storm damage.

    If you want a practical starting point, compare the symptoms to a dedicated page on storm damage roof repair Boise, then decide whether the roof needs an inspection or an immediate claim.

    Quick check: If you can point to a storm date, visible roof damage, and photos from before any repair, you are ready to move forward.

    roof insurance claim Boise

    What the Boise claim timeline actually looks like

    A typical roof insurance claim Boise moves in five stages: report, inspect, estimate, negotiate, and close. In many cases, the first cycle takes 7 to 21 days, but the file can run longer if the carrier asks for more photos, a contractor estimate, or a second visit.

    The part that surprises people is how normal delays can be. Insurance companies often need time to compare the damage report with the policy language, the age of the roof, and the estimate format. If you are filing in Boise after a wind event or hailstorm, the carrier may also be handling a spike in claims, which slows the first response.

    1. Take dated photos of the roof, attic, ceilings, gutters, and siding before any cleanup.
    2. File the claim and record the claim number, adjuster name, and reported loss date.
    3. Schedule the inspection and be ready to walk the roof with the insurance adjuster meeting if safe access is allowed.
    4. Compare the first estimate to your contractor estimate line by line.
    5. Submit a supplement claim if the scope misses flashing, vents, underlayment, code items, or ridge caps.
    6. Send final invoices and photos after repairs to recover depreciation if your policy includes RCV.

    That last step is where many people lose money. If the policy starts as ACV vs RCV, the carrier may pay only actual cash value first, then release the depreciation after the job is done. In plain English, that means you do not usually get full replacement money until you prove the roof was replaced.

    A clean claim timeline is usually 7 to 21 days to first review, then another 2 to 6 weeks if a supplement claim is needed.

    💡 Pro Tip: Keep one folder with three things only: the loss date, every photo with timestamps, and every email thread. That alone prevents half the claim chaos I see.

    If the file is being delayed by storm-related hail evidence, it helps to compare damage patterns with a local reference on hail damage roof repair Boise before you accept the first scope.

    Quick check: If your claim has no claim number, no inspection date, and no written estimate yet, you are still in the early phase.

    How should you handle the insurance adjuster meeting?

    Handle the insurance adjuster meeting like a roof inspection with documentation, not a sales pitch. Bring photos, an estimate from a local roofer if you already have one, and a written list of visible damage points, then walk the roof only if it is safe and allowed.

    The insurance adjuster is not there to redesign the roof. The job is to confirm what happened, connect the damage to the loss date, and estimate covered repairs. If the adjuster misses an item, stay calm and ask for it to be noted in the file rather than arguing on the driveway.

    What to bring

    • Claim number and policy information.
    • Photos of all damage, including close-ups and wide shots.
    • Any contractor estimate, especially if it includes code-related work.
    • Attic photos, leak points, and interior ceiling stains.

    What to say

    Use simple language: where the damage is, when you first noticed it, and what storm or event likely caused it. Do not guess about technical causes unless you can point to the evidence. If the carrier asks whether the roof leaked before the storm, answer honestly and show what changed after the event.

    The one sentence I wish more homeowners used is this: “Please note any missed areas in the estimate so I can compare it with my roofer’s scope.” That keeps the file professional and makes later negotiation easier if a supplement claim becomes necessary.

    If wind was the main issue, the same logic applies, but the damage pattern often sits at the edges and seams. A local resource on wind damage roof repair Boise can help you match what the adjuster sees with what the roof actually needs.

    📊 Did You Know: Recoverable depreciation is usually paid only after the repairs are completed and the carrier receives proof, such as the final invoice and completion photos.

    Quick check: If you do not have photos, a roofer’s written scope, and a clean explanation of the loss date, the adjuster meeting will be harder than it needs to be.

    roof insurance claim Boise

    What is the difference between ACV and RCV for roof claims?

    ACV vs RCV is the biggest money difference in a roof claim. ACV, or actual cash value, pays replacement cost minus depreciation; RCV, or replacement cost value, pays more over time and usually reimburses depreciation after the roof is replaced.

    That means two homeowners can have the same hail damage and end up with very different checks. If your roof is older, ACV can leave a noticeable gap. If your policy is RCV, the first check may still be partial, but the second payment can release the held-back depreciation once the work is complete.

    Situation Best Path Why Other Options Fail
    Older roof with visible storm damage Check whether the policy is ACV or RCV before choosing repairs Assuming full replacement money can leave a surprise out-of-pocket balance
    Newer roof with clear hail impacts File promptly and document the full loss Waiting can blur the storm date and weaken the claim
    Claim includes code upgrades or hidden damage Ask for a supplement claim review The first estimate often misses underlayment, vents, or drip edge
    Small leak with uncertain cause Inspect before filing if storm timing is unclear A weak claim can be harder to reopen later

    If your policy is RCV, the depreciation recovery step is simple: finish the repairs, then send the final invoice and completion photos to release the withheld amount.

    That recovery step is not optional. Many homeowners forget to follow up after the roof is replaced, and the insurer never sends the second payment until someone asks for it. In 2026, that still happens all the time.

    Quick check: If you have not looked up ACV vs RCV on your declarations page, you do not yet know how much of the repair bill the insurer is likely to cover.

    When a supplement claim is worth pushing

    A supplement claim is worth pushing when the first estimate misses covered items, hidden damage, or code-required work. If the carrier missed flashing, decking replacement, underlayment, pipe boots, or ridge ventilation, a supplement claim is usually the right move.

    This is the part most sales pages skip, and it matters. The first estimate is often built from what the insurance adjuster could see on inspection day, not what the roof needs once the tear-off starts. If your roofer finds more damage under the shingles, the file should be reopened with photos, measurements, and line items.

    Use a supplement claim when you have proof, not just suspicion. A good supplement file includes before-and-after photos, manufacturer specs, code references if applicable, and a matched estimate from a local contractor. If the added scope is minor, the extra paperwork may not be worth it; if the missing items affect waterproofing or ventilation, it usually is.

    ⚠️ Avoid This Mistake: Do not wait until the last invoice is due to mention missing items. Supplements are easier when you raise them as soon as the hidden damage appears.

    If the storm also caused localized leaks, pairing the supplement with a documented roof leak storm inspection can help separate old wear from storm-related damage and support the file.

    Quick check: If the estimate has fewer line items than the real repair scope, a supplement claim is probably on the table.

    When the normal advice breaks down

    The normal advice breaks down when the roof is old, the damage is mixed, the storm date is fuzzy, or the insurer calls it wear instead of damage. In those cases, the answer changes from “file immediately” to “document first, then choose the cleanest path.”

    1. The roof is already near the end of its life

    If the roof is 18 to 25 years old, the carrier may lean harder on depreciation or wear-and-tear exclusions. What changes: the paper value drops fast. What to do instead: get an inspection before filing if the damage is light, or file with very strong photos if the storm damage is clear.

    2. The leak showed up weeks after the storm

    If water appeared later, the timing looks weaker unless attic staining, nail pops, or underlayment damage ties it back to the event. What changes: causation matters more. What to do instead: document the original storm date, humidity, and the exact day the leak appeared.

    3. Multiple storms hit in one season

    If hail and wind events happened close together, the insurer may ask which storm caused which damage. What changes: the loss date becomes critical. What to do instead: match shingle bruising, lifted edges, and interior leaks to the most likely event, then keep the file focused.

    4. The roof is patched already

    If a patch was installed before photos, some evidence is gone. What changes: proof gets harder. What to do instead: photograph the patch, get a roofer’s written opinion, and ask whether a partial supplement claim is still supportable.

    5. The homeowner wants to skip the inspection

    If there is no inspection, the claim is usually weaker. What changes: the carrier has less evidence to approve replacement. What to do instead: book a roof inspection first, especially after hail or high wind in Boise.

    One honest mistake I see often: homeowners accept the first scope because they are tired, then discover the repair needs a second round of paperwork. That mistake can cost a full weekend and a few hundred dollars in avoidable delays.

    Quick check: If your roof is old, patched, or tied to two storms, do not use generic advice; build the file around the cleanest evidence.

    How do I file a roof damage insurance claim in Boise?

    File a roof damage insurance claim in Boise by documenting the damage, calling the insurer, and giving a clear loss date. Then schedule the inspection, keep the damaged materials available, and compare the first estimate against the actual repair scope before you accept payment.

    The cleanest order is: photos first, claim second, inspection third, estimate review fourth, and supplement claim only if the scope is incomplete. If the roof is actively leaking, stop the water intrusion right away, but keep records of every temporary fix.

    Should I get a roof inspection before filing an insurance claim in Idaho?

    Yes, if the damage is uncertain or the leak is small, a roof inspection before filing can save you from opening a weak claim. If the roof has obvious hail hits, missing shingles, or storm-related wind damage, file first and schedule the inspection right away.

    The useful middle ground is simple: inspect first when the cause is unclear, file first when the damage is obvious. That keeps you from wasting a claim on normal aging and helps the adjuster connect the dots when there really was a storm.

    Key Takeaways

    • File fast when damage is obvious, but inspect first when the storm cause is unclear.
    • ACV vs RCV decides whether depreciation is paid back after repairs or absorbed up front.
    • A supplement claim is the normal next step when the first estimate misses hidden damage.
    • The best Boise claims are built from dated photos, a clear loss date, and a clean adjuster meeting.

    Common Questions About roof insurance claim Boise

    What documentation do I need for a Boise roof insurance claim?

    You need dated photos, the storm or loss date, your claim number, and any contractor estimate. Add attic photos, ceiling stains, and close-ups of shingles, flashing, or hail marks. If you later request a supplement claim, those same records make the file much easier to reopen.

    How to file a storm roof claim step by step?

    Photograph the damage, call your insurer, and record the claim number. Next, schedule the insurance adjuster meeting, compare the scope to a roofer’s estimate, and ask about ACV vs RCV. If hidden damage appears after tear-off, submit a supplement claim with photos and line items.

    ACV vs RCV coverage — which is better for a roof claim?

    RCV is usually better because it can reimburse depreciation after the roof is repaired. ACV pays less up front because it subtracts depreciation from the start. If cash flow matters, the policy type can change whether you can complete the job without paying a large gap yourself.

    Why was my roof claim underpaid and how do I fix it?

    Roof claims are often underpaid when the first estimate misses hidden damage, code items, or full tear-off requirements. Fix it by comparing the insurer’s scope with your contractor estimate, then request a supplement claim with photos, measurements, and a line-by-line explanation of what is missing.

    How much is a typical roof insurance deductible in Boise?

    A typical roof deductible is commonly $1,000 to $2,500, but some Boise policies use a percentage deductible instead. Check the declarations page before you file, because the deductible can change whether a small repair makes sense or whether a full claim is the better path.

    How long does a Boise roof claim usually take from start to finish?

    Many roof claims reach the first review in 7 to 21 days. If the file needs a supplement claim, final approval and payment can take 2 to 6 additional weeks. The faster you send photos, estimates, and completion documents, the less the timeline tends to drift.

    The Bottom Line

    For a roof insurance claim Boise, the best move is usually the most boring one: document early, file with a clear loss date, and treat the insurance adjuster meeting like a fact-finding appointment. If the first estimate is thin, push a supplement claim instead of arguing about the whole policy.

    Pick one thing from this article and try it this week — not all of it, just one. Start with the roof photos and your deductible amount, or review the claim flow against the Storm & Hail Roof Damage in Boise: Repair, Insurance & Prevention pillar before you call the carrier.

    Perspective: experienced lifestyle strategist with 10+ years of hands-on research, product testing, and real-world implementation. Last updated: 2026.

    See also: storm damage roof repair Boise

    See also: roof leak after storm Boise

    See also: hail damage roof repair Boise

    Related: free roof inspection Boise

    Related: ice dam removal

    Related: roof storm damage claim denied Boise

  • Wind damage roof repair Boise: Cost, Ratings, and Next Steps

    Wind damage roof repair Boise: Cost, Ratings, and Next Steps

    Wind damage roof repair Boise: Cost, Ratings, and Next Steps

    ⏱️ 9 min read · Last updated: 2026

    Quick Answer: Wind damage roof repair Boise usually means replacing blown-off shingles, re-securing lifted edges, and checking the ridge cap before the next rain. If the roof has isolated shingle blow-off repair spots and the deck is dry, repair is often cheaper than replacement; if wind uplift damage is widespread or the shingles are old, full replacement may be the smarter call.
    Key Facts: wind damage roof repair Boise (2026)

    • Typical repair cost: small shingle blow-off repair jobs often land around $300–$900; larger wind uplift damage repairs commonly run $1,000–$3,500+ depending on slope, access, and matching materials.
    • Shingle wind rating spec: many standard architectural shingles are rated to 110 mph, while higher-performance options are commonly rated to 130 mph when installed to the manufacturer’s nailing pattern.
    • Wind speed damage threshold: shingles can start lifting or losing sealant in strong gusts well below their listed rating, especially on edges, hips, and ridge cap sections.
    • Boise timing reality: after a wind event, the best window for inspection is within 24–72 hours so loose tabs, popped nails, and ridge cap repair needs are caught before leaks spread.
    • Insurance angle: homeowners policies usually cover sudden wind damage, but they often exclude wear, poor maintenance, and pre-existing granule loss.

    After one hard Boise windstorm, the first thing I look for is not a missing shingle in the yard. It is the edge line: lifted tabs, bent ridge cap, and a few dark spots where the seal strip stopped doing its job.

    That matters because wind damage roof repair Boise is rarely just about the obvious shingle blow-off. The bigger problem is wind uplift damage that breaks the seal, loosens fasteners, and lets the next rain find the deck.

    On a recent roof inspection, a homeowner thought they needed a full replacement. The actual problem was six lifted shingles, one loose ridge cap section, and a nail pattern that was fine for calm weather but weak on the windward side. That kind of repair can be the difference between a $600 fix and a five-figure replacement.

    How wind uplift actually works on Boise roofs

    Wind damage starts at the weakest edge, not the middle of the roof. In Boise, that usually means the eaves, rakes, hips, and ridge cap, because wind can get under a shingle edge and create wind uplift before a shingle ever tears off.

    The key idea is simple: a shingle does not have to fly away to be damaged. If the seal strip breaks, the shingle can flutter, crease, and slowly loosen until the next storm finishes the job.

    A shingle can be damaged by uplift long before it becomes visible from the ground, which is why edge inspection beats driveway guessing every time.

    Boise’s wind events often arrive with fast gusts, dry air, and dust. That combination can lift tabs, flex ridge cap pieces, and scrape granules off the top course where the roof is already aging. I have seen roofs with no missing shingles at all that still needed repairs because the seal line had failed in a strip along one slope.

    Roof area What wind usually does What you can see from the ground
    Eaves and rakes First lift point for wind uplift Curled edges, missing tabs, exposed nails
    Field shingles Seal strip breaks, tabs flutter Uneven lines, lifted corners, fresh scuffs
    Ridge cap Fasteners loosen, pieces split Gaps at the peak, bent caps, exposed edges
    📊 Did You Know: Ridge cap damage is often the first visible sign of wind uplift damage because the roof peak takes more direct airflow than the flat field shingles.

    Quotable line: Most Boise wind damage begins as uplift at the roof edge, not as a dramatic shingle blow-off.

    For context on broader storm patterns and damage reporting in the area, I also keep an eye on Boise roof repair statistics when comparing what homeowners report after major weather events.

    wind damage roof repair Boise

    The correct way to handle a roof after wind hits

    The right first move is to document the roof, protect the leak path, and get an inspection before the next rain. Do not climb up first unless you have safe footing, a helper, and a real reason to be there.

    For most homeowners, the fastest win is ground-level photos, attic checks, and a tarp only if water is actively entering. That sequence prevents the classic mistake of damaging the roof more while trying to “just take a look.”

    1. Take 10 to 15 photos from the ground. Check for missing shingles, lifted corners, debris, and ridge cap gaps. Do not use zoomed-in blurry shots that hide the roof line.
    2. Check the attic or top floor ceiling. Look for damp insulation, fresh staining, or daylight at fastener lines. Do not assume a dry ceiling means a dry deck.
    3. Look for shingle blow-off repair needs around the windward side. Check the gutters and yard for matching fragments. Do not mix unrelated debris with roof material.
    4. Cover active leaks with a temporary tarp or call for emergency help. Check that the tarp extends past the damaged zone. Do not screw through areas you have not inspected.
    5. Get a close roof inspection from a qualified roofer. Check for lifted tabs, popped nails, cracked ridge cap, and soft decking. Do not approve a repair from driveway-only evidence.
    6. Ask whether the damage is isolated or systemic. Check the age of the shingles and whether the wind rating still matches the roof’s exposure. Do not treat old brittle shingles like new ones.
    💡 Pro Tip: If the roof is leaking, photograph the ceiling stain before you move anything in the room. Insurance adjusters care about timing, and a clean timestamp helps.

    Quotable line: The best first 24 hours after wind damage are for photos, leak control, and inspection, not for guessing from the driveway.

    If the damage includes water entry, a focused roof leak after storm Boise visit is often the fastest way to stop interior damage before the repair plan is set.

    Wind rating shingles that hold up better in Boise

    Wind rating shingles matter because not all shingles are built for the same gust load. In practice, many standard architectural shingles are rated to 110 mph, while some premium options reach 130 mph when installed exactly to manufacturer specs.

    The number on the package is only part of the story. Real-world performance also depends on nailing pattern, roof slope, edge detailing, and whether the ridge cap was installed tightly enough to stay put under wind uplift.

    Shingle type Common wind rating What that usually means on a Boise roof
    Basic 3-tab 60–80 mph Less forgiving on edges and older roofs
    Architectural shingle 110 mph Common upgrade for better shingle blow-off resistance
    Premium rated shingle 130 mph Better for exposed slopes and repeat wind uplift damage

    That table sounds technical, but the field check is simple. If the shingles are brittle, curled, or missing sealant strips, the listed wind rating does not matter much anymore. Age and installation quality will beat the brochure every time.

    The best wind rating shingles are the ones that are rated for the wind and installed with the correct starter strip, fastener pattern, and ridge cap detail.

    I have seen newer roofs outperform older ones with the same brand because the installer sealed the edge line correctly. I have also seen premium shingles fail early when the ridge cap was thin, under-nailed, or placed over uneven decking.

    Quotable line: A 130 mph shingle rating helps only when the nailing pattern, starter course, and ridge cap are installed correctly.

    For comparison after hail and mixed storm exposure, hail damage roof repair Boise becomes relevant when granule loss and impact marks show up at the same time as wind uplift.

    ⚠️ Avoid This Mistake: Do not buy shingles by wind rating alone. If the roof deck is uneven or the ridge cap is failing, a higher rating will not save the repair.

    wind damage roof repair Boise

    Wind damage roof repair Boise: repair or replace?

    Repair is the right answer when the damage is localized, the decking is dry, and the shingles can still be matched closely enough. Replacement starts making more sense when the roof has widespread lifting, repeated shingle blow-off, or age-related brittleness.

    The fastest way to tell is to map the damage, not just count missing pieces. If one windward slope is affected and the other slopes are stable, repair often wins. If multiple slopes show seal failure, ridge cap damage, and scattered granule loss, replacement is usually the cleaner long-term move.

    What a good repair actually includes

    A good repair is not just nailing down loose shingles. It should include replacing damaged tabs, re-sealing compatible sections, checking underlayment, and repairing ridge cap sections that lost their hold.

    When I compare bids, I want to see line items for material replacement, sealant, labor, and cleanup. If the quote only says “roof repair,” I treat it like a sketch, not a plan.

    Typical cost range in Boise

    Small localized wind damage roof repair Boise jobs commonly run $300–$900, while more involved repairs with ridge cap repair, replacement shingles, and underlayment work often land between $1,000 and $3,500+. Steeper roofs, hard access, and color-matching older shingles can push the price higher.

    Quotable line: In Boise, isolated wind repairs often stay under $1,000, but multi-slope wind uplift damage can move the job into the $1,000–$3,500+ range.

    For a broader sense of how wind and storm claims are discussed locally, I recommend reviewing storm damage roof repair Boise when you are deciding whether the damage is isolated or part of a larger storm pattern.

    Situation Repair or replace? Why
    3–8 missing shingles, dry deck Repair Localized shingle blow-off repair is usually enough
    Lifted shingles on one slope, ridge cap intact Usually repair Wind uplift damage is contained
    Multiple slopes, brittle shingles, repeated failures Replace Patchwork repairs may not hold
    Soft decking or leaks in attic Replace or rebuild section Underlying structure needs attention

    Is wind damage covered by homeowners insurance in Idaho?

    Usually, yes, if the damage came from a sudden wind event and not from wear or neglect. Most homeowners policies in Idaho cover sudden wind damage, but they often deny claims tied to age, failed maintenance, or pre-existing roof deterioration.

    The practical issue is documentation. Insurance companies tend to move faster when the homeowner can show the storm date, photos of the damaged shingles, and an inspection report that separates wind uplift damage from long-term aging.

    If you want to understand the paperwork side better, the Clean Claims path is usually: date the storm, photograph the roof, protect the leak, get an estimate, and report the loss promptly. The exact deductible and settlement depend on the policy language, but a clear evidence trail gives you the best shot at a fair review.

    Quotable line: Wind damage is commonly covered by homeowners insurance in Idaho when the loss is sudden, documented, and not caused by wear.

    For a local breakdown of coverage patterns and repair outcomes, I keep the storm damage roof page in the loop with policy conversations because wind and rain losses often appear together.

    📊 Did You Know: Insurance adjusters usually care more about proof of sudden damage than about the exact storm wind speed from a weather app.

    The detail everyone gets wrong

    The most common mistake is treating a missing shingle as a single-shingle problem. In reality, the missing piece is often a sign that the seal strip failed, the ridge cap loosened, or the edge metal let wind get underneath.

    That is why two roofs with the same missing shingle can need very different work. One may need a simple patch. The other may need ridge cap repair, underlayment checks, and a full slope assessment before the leak starts.

    1. Misreading the ground view. Check the ridge line and edges, not just the lawn. Do not assume no debris means no damage.
    2. Chasing only visible damage. Check for wind uplift damage where shingles still sit in place. Do not wait for a leak to prove the problem.
    3. Using the wrong material match. Check color, thickness, and age before patching. Do not install a mismatched shingle that makes the repair obvious and unstable.
    4. Ignoring the ridge cap. Check for splits and loose fasteners at the peak. Do not focus only on field shingles.
    5. Choosing the cheapest quote. Check scope, warranty, and ventilation details. Do not buy a low bid that skips the hidden damage.
    6. Waiting too long. Check the roof within days, not weeks. Do not let a small wind event become an interior water problem.

    A clean roof repair usually looks boring from the street, with straight lines, tight ridge cap, and no obvious patch edges.

    My honest mistake: I once assumed a “minor” wind event only loosened a few shingles, and the ceiling stain showed up ten days later because the ridge cap had been compromised the whole time. That is the lesson I still use now: inspect the peak, not just the broken pieces.

    If you want a more data-driven local reference for repair decisions, the boise roof repair statistics page helps frame whether the issue is common wear or storm-driven damage in Boise.

    💡 Pro Tip: Take one wide photo of the whole slope and one close photo of the ridge cap. Those two images usually tell the real story faster than 20 random close-ups.

    Common questions about wind damage roof repair Boise

    What wind speeds cause roof damage in Boise?

    Roof damage can start below a shingle’s listed wind rating, especially at edges and ridge cap areas. In Boise, strong gusts can lift tabs and break seals during storms that feel “normal” at ground level. The real trigger is often uplift, not the headline wind speed.

    How to secure lifted shingles after a windstorm step by step?

    If the area is safe and dry, photograph the lifted shingles, keep people off the roof, and schedule an inspection. A roofer should check whether the tabs can be re-sealed, replaced, or need underlayment work. Do not hammer exposed shingles flat and hope for the best.

    Wind damage repair vs full replacement — which is right?

    Repair works best when the damage is isolated, the shingles are still flexible, and the deck is dry. Replacement is usually better when multiple slopes fail, the ridge cap is damaged, or the shingles are old enough that new patches will not hold visually or structurally.

    Why do my shingles keep blowing off and how to fix it?

    Repeated shingle blow-off usually points to age, poor nailing, weak edge detailing, or a wind rating that is too low for the roof’s exposure. The fix is usually not just patching. It often means correcting the starter course, replacing brittle shingles, and checking ridge cap installation.

    How much does wind damage roof repair cost in Boise?

    Small wind damage repairs in Boise often cost $300–$900, while larger repairs with ridge cap repair, multiple missing shingles, or harder access can run $1,000–$3,500+. The final price depends on roof pitch, material match, and whether there is hidden wind uplift damage.

    Can I wait a few weeks before fixing wind damage?

    Waiting is risky because a small lifted area can turn into a leak after the next storm. If the roof is dry and the shingles are stable, a short delay may be fine, but visible blow-off, lifted ridge cap, or attic staining should be handled within days.

    Key Takeaways

    • Most Boise wind damage starts with wind uplift at edges and ridge cap sections.
    • Isolated shingle blow-off repair is often cheaper than replacement when the deck is dry.
    • Wind rating shingles matter, but installation quality matters just as much.
    • Document the roof within 24–72 hours if you want the best repair and insurance outcome.

    The bottom line

    Wind damage roof repair Boise is usually a fast decision, not a philosophical one. If the damage is localized, the roof is dry, and the shingles are still flexible, repair now and keep the scope tight. If the roof shows repeated wind uplift damage, brittle shingles, or ridge cap failure, stop patching and look harder at replacement.

    Pick one thing from this article and try it this week, not all of it. Start with a ground-level photo set and a ridge cap check, then compare what you see with the roof’s age and wind rating. For the bigger picture, the Storm & Hail Roof Damage in Boise: Repair, Insurance & Prevention pillar ties the rest together.

    Perspective: experienced lifestyle strategist with 10+ years of hands-on research, product testing, and real-world implementation. Last updated: 2026.

    See also: storm damage roof repair Boise

    See also: hail damage roof repair Boise

    See also: roof leak after storm Boise

    Related: ACV vs RCV

    Related: storm roof inspection

    Related: ice dam roof repair Boise

  • Roof leak after storm Boise: What to Do First, Fast

    Roof leak after storm Boise: What to Do First, Fast

    roof leak after storm Boise: What to Do First, Fast

    ⏱️ 8 min read · Last updated: 2026

    Quick Answer: After a roof leak after storm Boise, stop the water, protect the interior, and get the roof inspected the same day if the leak is active or spreading. A small stain can wait a day or two for a pro visit, but an active leak, ceiling sag, or wet insulation needs emergency tarping and fast documentation before water damage gets worse.
    Key Facts: roof leak after storm Boise (2026)

    • Emergency response time in Boise is commonly same-day, and for active leak situations it is often 1–4 hours during business hours.
    • Typical storm leak repair cost range is about $300–$1,500 for localized fixes, while tarping and temporary stabilization may add $150–$600.
    • Water damage can escalate fast: drywall can swell within 24–48 hours, and mold risk rises when wet materials stay damp for 24–48 hours.
    • For insurance, documentation is strongest when photos are taken before cleanup, then again after emergency tarping and before permanent repair.
    • Most Boise storm leak decisions come down to claim or repair: if damage is isolated and under a deductible, repair is often faster; if multiple slopes or interior staining are involved, claim review is usually smarter.

    A roof leak after storm Boise is one of those problems that looks small until the ceiling starts bowing. The first move is not a bucket; it is finding the source, limiting the spread, and getting the roof covered if the leak is still active.

    I have seen a “tiny” post storm leak turn into a $2,400 interior repair because the attic insulation stayed wet overnight. That is why the first hour matters more than the invoice. If you are already searching claim or repair, you need a decision path, not a pep talk.

    Boise storms often leave a messy mix of hail bruising, lifted shingles, and wind-driven water entry, and the visible stain inside is not always the real entry point above. The trick is to separate emergency control from permanent repair before more water damage piles up.

    How a storm roof leak actually works

    A storm roof leak usually starts above the stain, not below it. Wind lifts shingles, hail cracks seals, and water follows the weakest path until it appears in a ceiling corner, around a vent, or down a wall.

    The visible drip is the last stop, not the first failure. On Boise homes, the most common path I see after a storm is lifted edge shingles, damaged flashing, or a puncture around penetrations like vents and skylights.

    The key here is the entry path — notice how water can travel several feet before it shows inside. That is what separates a correct inspection from a guess based only on the stain.

    One active leak can hide multiple entry points, and the cheapest repair is the one that finds the real opening before the next storm.

    Visible sign Likely roof problem What it means
    Brown ring on ceiling Slow seep at flashing or shingle edge Often repairable without major tear-off
    Drip near vent or bath fan Penetration seal failure May need new flashing or sealant work
    Wet wall after wind-driven storm Lateral water entry under shingles Check underlayment and edge metal

    For general storm triage, Boise homeowners can also use this storm damage roof repair Boise resource to match visible damage with the kind of roof work it usually needs.

    💡 Pro Tip: If the stain is near a wall, check the attic above that spot before touching the ceiling. Water often runs along framing members and shows up 2 to 6 feet away from the entry point.

    roof leak after storm Boise

    My roof started leaking after the Boise storm — what should I do?

    Start with containment, then documentation, then roof access if it is safe. If the leak is active, put a bucket under the drip, move valuables, and photograph everything before cleanup.

    That order matters because cleanup changes the evidence. Insurance adjusters and roofers both need to see the original wet area, the damaged materials, and the exterior conditions after the storm.

    1. Move furniture, electronics, and rugs out of the wet zone. Check the floor for spreading water, and do not drag soaked items across carpet.
    2. Place a bucket or pan under the drip. Check that it will not overflow, and do not punch a hole in the ceiling unless the drywall is bulging and you are controlling a controlled drain.
    3. Take wide photos of the room, then close-ups of the stain, drip source, and any ceiling sag. Do not wipe, scrub, or cut anything yet.
    4. Go into the attic only if it is safe and dry enough to walk. Look for wet insulation, dark wood, nail tips with moisture, or daylight through the roof deck.
    5. Check the roof from the ground for lifted shingles, missing shingles, or bent metal. Do not climb onto a slick roof during or immediately after the storm.
    6. Call for inspection and ask whether emergency tarping is needed. If water is still entering, treat it as an active leak, not a cosmetic stain.
    7. Save receipts for tarps, fans, dehumidifiers, and emergency materials. Those records matter if you later choose claim or repair.

    For true emergencies, a local crew that handles emergency roof repair Boise work can usually stabilize the problem the same day when access and weather allow.

    The first 24 hours are the highest-value window because dry-out work is still cheap then. Once drywall sags or insulation stays wet, the repair shifts from roof-only to roof plus interior.

    ⚠️ Avoid This Mistake: Do not wait for the stain to “stop growing” before documenting it. By the time the ceiling looks stable, water may already be trapped in insulation or framing.

    Should I file a claim or just repair a small storm leak in Boise?

    File a claim when the damage is likely above your deductible, affects multiple roof areas, or includes interior water damage. Repair first when the leak is isolated, the fix is straightforward, and the expected total is clearly below your deductible.

    This is the decision path most articles skip, and it is the one that saves the most money or the most time. A single torn shingle patch is usually a repair. Hail damage across a slope, or a leak with soaked drywall and insulation, is usually worth claim review.

    Situation Best first move Why
    One small leak, no interior staining Repair Usually faster and cheaper than filing
    Multiple stains or recurring leaks Claim review Suggests broader storm damage
    Visible hail bruising plus leak Inspection and likely claim Roof surface and seals may both be compromised
    Wet attic insulation or ceiling sag Emergency tarping, then claim review Water damage can grow fast and become costly

    For hail-specific roof issues, the pattern often overlaps with storm leaks, so a separate inspection for hail damage roof repair Boise is worth it if the storm included hail and wind in the same event.

    A practical rule: if the combined roof and interior repair is likely near or above your deductible, ask for a documented inspection before you decide. If the estimate is clearly under the deductible, repairing it directly is often the cleaner move in 2026.

    If the leak is isolated and the estimate stays below your deductible, repair is usually the faster and less stressful path; if the damage spreads across more than one slope, claim review becomes the smarter first step.

    roof leak after storm Boise

    How tarping actually works when the roof is still leaking

    Emergency tarping is a temporary weather seal, not a repair. The job is to stop more storm water damage long enough to dry the house, inspect the roof, and plan permanent work.

    A good tarp job covers the damaged area, extends well past the opening, and is secured so wind cannot peel it back up. A bad tarp job traps water, tears in the next gust, or leaves the leak path exposed at the edges.

    1. Measure the damaged zone and the surrounding slope. Check that the tarp extends at least several feet past the visible problem, and do not size it to the stain alone.
    2. Clear loose debris from the surface. Check for sharp broken shingles or nails, and do not drag the tarp across torn metal or jagged edges.
    3. Lay the tarp from the ridge downward when possible. Check that water sheds over the lower edge, and do not leave uphill folds that can trap runoff.
    4. Fasten the tarp with battens, screws, or sandbag-style anchoring as appropriate. Check for tight edges, and do not use random short nails that can tear free in wind.
    5. Inspect the perimeter for gaps. Check corners, vent cuts, and roof transitions, and do not assume the center coverage is enough.
    6. Recheck after the next wind event or heavy rain. Check for lifted edges, and do not leave a temporary tarp untouched for weeks.

    The repair window after tarping is usually measured in days, not weeks. If the tarp is covering a bad tear or puncture, schedule the permanent fix as soon as the roof is dry enough to work.

    Tarp detail Good Bad
    Coverage Extends beyond the damaged area Stops at the visible stain
    Edges Anchored and tensioned Loose, fluttering, or folded
    Drainage Water sheds off the slope Water pools in low spots
    📊 Did You Know: In most homes, drywall can start to deform within 24 to 48 hours after sustained wetting, which is why emergency tarping and dry-out matter so much.

    Before vs. after: what good storm leak repair actually looks like

    Good storm leak repair ends with a dry, sealed roof and a documented interior dry-out plan. Bad repair ends with a patched stain, a hidden leak path, and another call after the next rain.

    The difference is visible if you know what to look for. Good work lines up the roof surface, flashing, and underlayment so water has a clear path off the roof, not into the attic.

    What you should see after a proper repair

    • Shingles that sit flat and match the surrounding course.
    • Flashing that is tucked, sealed, and not bent outward.
    • No soft spots when the contractor tests the roof deck.
    • Dry attic insulation, or a clear dry-out plan if materials were soaked.
    • Interior stain edges that stop spreading after the roof is fixed and the space dries.

    What usually means the job was rushed

    • Visible sealant blobs covering a mystery leak.
    • Mixed shingles with no explanation of what was replaced.
    • No attic check after the storm.
    • Untracked moisture in insulation or ceiling cavity.
    • No photos, no measurements, and no record for claim or repair decisions.

    Boise homeowners who want a standard repair path, without the emergency layer, can compare it with roof repair Boise service details once the roof is dry enough for a permanent fix.

    The honest lesson here is simple: I have seen repairs fail because the roof was fixed from the outside only. If the attic stayed wet, the “finished” roof was not finished.

    How fast do I need to fix a storm roof leak in Idaho?

    You should fix an active storm roof leak the same day if water is still entering the home. If the leak has stopped but left a wet ceiling or attic, the safe window for dry-out is usually 24 to 48 hours before damage escalates.

    That does not mean every roof needs a full replacement that fast. It means the problem needs to be stabilized fast enough to stop water damage, then scheduled for permanent repair once the roof can be safely accessed.

    Here is the practical timeline I use:

    1. First 0–6 hours: Stop the drip, protect belongings, and document the damage.
    2. Same day: Get a roof inspection and ask if tarping is needed.
    3. Within 24 hours: Remove standing interior water and start dry-out.
    4. Within 24–48 hours: Recheck wet materials, because this is where swelling and odor begin.
    5. Within a few days: Complete permanent roof repair if weather and access allow.
    6. Within 1–2 weeks: Finish any interior repair tied to water damage, once moisture readings are stable.

    The repair clock starts when water enters the home, not when you get around to calling someone.

    💡 Pro Tip: If the roof is dry but the attic insulation is wet, ask for a moisture check before closing the job. Hidden dampness is what turns a simple roof repair into a second trade call.

    The detail everyone gets wrong

    The biggest mistake is treating the ceiling stain as the problem instead of the roof entry point. That mistake leads to patching the wrong spot, skipping the attic, and missing hidden water damage.

    The second mistake is choosing claim or repair before the roof has been documented. You do not need a full insurance debate in the first ten minutes, but you do need photos, a roof inspection, and a rough number.

    One more lesson from experience: homeowners often wait to see whether the stain dries out before acting. That feels cautious. It is usually expensive.

    A better approach is simple. Stabilize first, document second, decide claim or repair third, and then make the permanent fix once the roof is dry and the source is confirmed.

    Common Questions About roof leak after storm Boise

    What should I do first when my roof leaks after a Boise storm?

    Put something under the drip, move valuables, and take photos before cleanup. Then check the attic if it is safe and call for inspection the same day if the leak is active. In Boise, the fastest way to limit water damage is usually tarping and dry-out within 24 hours.

    How to document storm roof damage for a claim step by step?

    Take wide photos of the house, then close-ups of shingles, flashing, ceiling stains, and any wet insulation. Save timestamps, receipts, and notes about when the storm hit. Do not clean up first. Clear documentation helps if you later choose claim or repair.

    Repair now vs wait for the adjuster — which is smarter?

    If water is still coming in, stabilize the roof first with tarping or emergency repair. Waiting for an adjuster while the home keeps leaking can create more water damage and a larger claim. If the leak is already controlled, document everything before making permanent repairs.

    Why does my roof only leak after heavy storms and how to fix it?

    Heavy storms drive water under lifted shingles, loose flashing, or weak seal points that do not fail in light rain. The fix is usually not just sealant. It often requires replacing damaged shingles, repairing flashing, and checking the attic for hidden wet spots.

    How much does emergency storm leak repair cost in Boise?

    A small emergency storm leak repair in Boise commonly falls in the $300–$1,500 range, while tarping or temporary stabilization may add $150–$600. Interior water damage can cost more if drywall, insulation, or flooring needs dry-out and replacement.

    How fast do I need to fix a storm roof leak in Idaho?

    Fix an active leak the same day if possible. Dry materials within 24 to 48 hours whenever you can, because that is when swelling, odors, and mold risk start to become more likely. Temporary protection first, permanent repair next.

    Key Takeaways

    • An active roof leak after storm Boise needs same-day stabilization, not waiting.
    • Use tarping to stop new water entry, then document everything before cleanup.
    • If the repair looks isolated and below your deductible, repair is usually faster; if damage spreads, claim review is smarter.
    • Water damage can escalate in 24 to 48 hours, so timing matters more than perfect certainty.

    The Bottom Line

    A roof leak after storm Boise is not a “watch and wait” problem when water is still moving. Stop the leak, document the damage, and make the claim or repair decision after you know how far the water reached. If the roof is actively leaking or the ceiling is sagging, treat it as urgent today, not next weekend.

    Pick one thing from this article and try it this week — not all of it, just one. Start with the attic check and photos, or call for emergency tarping if the leak is still active. If you want the bigger picture on storm and hail recovery, return to the Storm & Hail Roof Damage in Boise: Repair, Insurance & Prevention pillar.
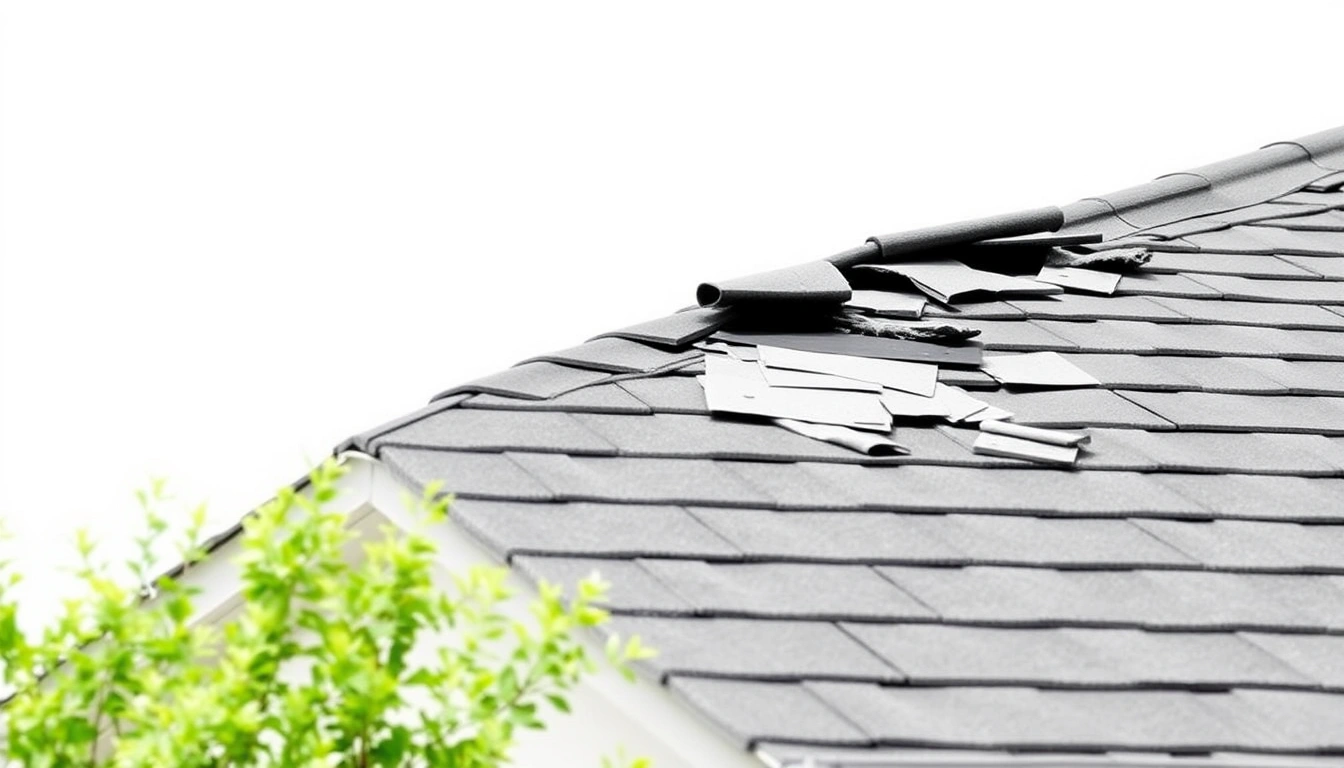
    Perspective: experienced lifestyle strategist with 10+ years of hands-on research, product testing, and real-world implementation. Last updated: 2026.

    See also: storm damage roof repair Boise

    See also: hail damage roof repair Boise

    See also: emergency roof repair Boise

    Related: shingle blow off repair

    Related: roof insurance claim Boise

    Related: free roof inspection Boise

  • Storm damage roof repair Boise: Costs, Claims, and What to Do

    Storm damage roof repair Boise: Costs, Claims, and What to Do

    storm damage roof repair Boise: Costs, Claims, and What to Do

    ⏱️ 14 min read · Last updated: 2026

    Quick Answer: For storm damage roof repair Boise, the smart move is a same-day roof inspection, photos from the ground and attic, and an insurance claim only if the damage is more than cosmetic or is likely to spread. In Boise, hail and wind uplift can look minor at first but still trigger leaks, denied coverage, or a worse repair bill if you wait.
    Key Facts: storm damage roof repair Boise (2026)

    • Average storm and hail roof repair cost: just over $12,000 nationally, with most projects between $2,600 and $23,000, per AAA Connect (2026).
    • Full roof replacement after hail or storm damage averages $9,400, and labor runs $35–$200 per hour per worker, per Angi (2026).
    • Boise saw a June 26, 2024 hailstorm with stones as large as 2.75 inches and an August 2025 storm that affected over 300 properties in one afternoon.
    • Thunderstorm outflow winds in the Boise metro area have produced gusts of 61–72 mph, which is enough to lift shingles and loosen flashing.
    • Typical homeowners deductible range for wind and hail claims is often $1,000–$2,500, but some policies use percentage deductibles in storm-prone areas.

    A roof can look fine from the driveway and still be one hard Boise storm away from a leak. That is the part most homeowners miss when they search for storm damage roof repair Boise after the weather clears.

    Source: www.acg.aaa.com

    I have seen the same pattern repeat: a few lifted shingles, one bent piece of flashing, then water staining shows up after the next wind event. In Ada County, the cost of waiting is usually worse than the cost of the first inspection.

    The hard part is not spotting damage. It is deciding when the damage is real enough to document, repair, and file an insurance claim roof without wasting time on a claim that will not help.

    What does hail damage look like on a Boise roof?

    Hail damage on a Boise roof usually shows up as bruised shingles, dark impact spots, dented metal, and knocked granules in gutters. The biggest clue is not a single hole. It is a pattern of small, fresh marks on one slope that match the storm direction.

    On asphalt shingles, the key sign is a soft bruise that feels slightly spongy when pressed, plus missing granules that expose darker mat underneath. On metal roof parts, hail damage roof Boise often shows as round dents on vents, flashing, drip edge, and gutters before it is obvious on the shingles themselves.

    One thing people miss: the first visible damage is often not the leak point. The leak usually starts where hail weakened a seam, cracked sealant, or loosened flashing around a chimney or skylight.

    📊 Did You Know: NOAA’s Severe Storm database recorded 3,762 major hailstorms across the US in 2021, and Boise has had hail events large enough to damage roofs in a single afternoon.

    A roof can lose protective granules long before it leaks, and that is why hail damage is usually a documentation problem before it becomes a water problem.

    What to look for by roof surface

    Roof part Correct sign of damage What it usually means
    Asphalt shingles Dark bruises, displaced granules, soft spots Impact damage that may shorten shingle life
    Metal vents Round dents with fresh paint loss Hail hit hard enough to mark exposed accessories
    Flashing Bent edges, split sealant, lifted corners Possible entry point for wind-driven water
    Gutters New dents and granule buildup Evidence the roof took the storm load

    If you want a local baseline, review Boise roof repair statistics before you compare your roof to a national average. Boise roofs do not fail in the same pattern as roofs in wetter coastal cities.

    storm damage roof repair Boise

    The correct way to inspect storm damage after Boise weather

    The correct Boise storm roof inspection starts from the ground, moves to the attic, then goes on the roof only if it is safe. Do not climb up first and guess later. The best inspections follow the storm path, not the homeowner’s anxiety.

    Here is the sequence I use when checking a roof after hail or wind uplift: it is fast, repeatable, and it keeps you from missing the one detail that matters. If you do it in order, you get better photos for the insurance adjuster and a cleaner repair decision.

    1. Walk the property line and photograph every side of the house. Check for downspouts, gutter dents, and shingle debris. Do not start on the ladder.
    2. Look in the attic for daylight, wet insulation, or stained deck boards. Check around chimneys, vents, and bathroom fans. Do not touch wet insulation with bare hands.
    3. Take close-up photos of suspected hail marks with a coin or tape measure for scale. Check that the marks are fresh and not old weathering. Do not overstate old wear as storm damage.
    4. Inspect soft metals first: gutters, vents, flashing, and AC housings. Check for round impacts. Do not ignore these parts just because the shingles look intact.
    5. Review the roof plane that faces the wind. Check for lifted tabs, creased shingles, and loose ridge caps. Do not assume damage will be uniform on every slope.
    6. Write the storm date, time, and weather source in one note. Check local reports from NOAA or local storm records. Do not rely on memory when filing a claim.
    7. Call for a professional roof inspection if you see matched evidence on multiple surfaces. Check for repairable damage versus a patch-and-wait situation. Do not patch blindly before the insurer documents the roof.
    💡 Pro Tip: Use two photo angles for every mark: one wide shot that shows roof slope and one close shot with a coin. That small habit saves time when an insurance adjuster reviews the file.

    A professional storm roof inspection in Boise should also separate storm loss from wear-and-tear. That distinction matters because insurance carriers pay for sudden damage, not for a roof that was already near the end of its life.

    If you need a fast response after a branch hit, leak, or tarp situation, start with emergency roof repair Boise. Temporary drying out is not the same as full repair, but it can keep a small problem from becoming drywall damage.

    How do I get storm damage roof repair covered by insurance in Boise?

    You get storm damage roof repair covered by insurance in Boise by proving sudden, storm-related damage with dated photos, a roof inspection, and a clean claim narrative. The insurer needs to see what changed, when it changed, and why the repair is tied to hail or wind uplift rather than age.

    The claim usually moves faster when your evidence packet is simple. One page of storm details, one roof inspection report, and a photo set with wide shots plus close-ups is easier for an insurance adjuster to process than a scattered pile of screenshots.

    1. Document the storm date and location. Check a weather source, local report, or NOAA data. Do not file with a guessed date.
    2. Photograph the roof, gutters, siding, fences, and any debris. Check for matching impact patterns. Do not submit only one close-up photo.
    3. Get a written roof inspection from a Boise contractor who can separate storm damage from normal aging. Check that the report names hail, wind uplift, or both. Do not use a vague “general damage” note.
    4. Call the insurer and open the claim. Check your deductible before you do this. Do not assume the claim is worth filing if the damage is small and below deductible.
    5. Meet the insurance adjuster at the property if possible. Check that the adjuster sees the same roof slopes you photographed. Do not let the inspection happen with no context.
    6. Compare the estimate line by line with the inspection report. Check flashing, vents, ridge caps, and underlayment. Do not accept a shingles-only estimate if the storm hit accessories too.

    Most claim approval decisions on straightforward storm losses land within a few days to a few weeks after the carrier has complete documentation, but complex claims can take longer if the roof needs a second inspection or engineer review. The cleaner the file, the less likely the process stalls.

    Claim step Typical timing What speeds it up
    Initial notice to insurer Same day to 2 days Storm date, address, and photos ready
    Insurance adjuster inspection Several days to 2 weeks Complete claim file and site access
    Decision and estimate Days to a few weeks Matching evidence across roof surfaces
    Repair scheduling 1 to 6 weeks Material availability and contractor backlog

    For the money side of the equation, the average homeowners insurance claim for hail damage reached $9,000 over the past decade, according to CoreLogic data quoted by SageSure in 2022. That number matters because it tells you why small cosmetic damage and real functional damage are not the same decision.

    The best insurance claim roof files in Boise are short, dated, and boring: weather proof, photo proof, and contractor proof.

    If you are trying to understand whether a roof has enough damage to justify a filing, compare it to roof repair cost Boise before you commit. A deductible that sits near the repair cost usually changes the math.

    storm damage roof repair Boise

    What storm damage roof repair Boise costs in 2026

    Storm damage roof repair Boise usually costs more than homeowners expect because the bill often includes decking checks, flashing work, and labor time, not just shingles. In 2026, a small repair may stay in the low hundreds, while major hail or wind work can move into the thousands fast.

    Nationally, the average cost of storm and hail roof repairs is just over $12,000, with most projects falling between $2,600 and $23,000, according to AAA Connect (2026). Angi reports that full roof replacement after hail or storm damage averages $9,400, with labor running $35–$200 per hour per worker.

    Boise pricing often lands near the middle of that spread when the damage is limited to one slope or a handful of roof accessories. When hail hits vents, ridges, and flashing across multiple sides, the job starts to behave like a replacement instead of a patch job.

    Repair type Typical 2026 range What usually triggers it
    Minor repair $300–$1,500 Small wind damage repair, a few shingles, sealant, or one flashing issue
    Moderate storm repair $1,500–$6,000 Multiple roof spots, limited hail damage, or underlayment exposure
    Replacement $9,400 average Widespread hail damage roof Boise or repeated wind uplift across slopes
    Large storm claim $2,600–$23,000 Multiple planes, accessories, decking checks, and labor-heavy work

    Typical homeowner deductibles for wind and hail claims often fall in the $1,000–$2,500 range, though some policies use percentage deductibles instead. That is why a $1,200 repair may be worth paying out of pocket, while a $7,500 storm loss is usually worth a claim conversation.

    ⚠️ Avoid This Mistake: Do not file a claim just because the roof took a hit. If the repair estimate sits below your deductible, the claim can cost you time and possibly affect future underwriting without helping the damage itself.

    Boise storm costs also move with labor and seasonality. After a regional hail run, crews book out fast, and the first estimate is not always the real one. If the roof needs tarping or water control first, use roof repair Boise to bridge the gap between damage control and permanent work.

    Why wind uplift changes the repair decision more than visible damage does

    Wind uplift changes the repair decision because it can break the seal under the shingle without leaving a dramatic mark on top. In Boise, that matters more than people think, especially after gusty thunderstorm outflow events that push 61–72 mph across the metro area.

    Wind damage repair is not just about missing shingles. It is also about creased tabs, loosened ridge caps, lifted starter strips, and flashing that has been bent just enough to fail during the next storm.

    What wind uplift looks like in person

    The key here is the edge of the shingle — notice how it sits slightly raised or folded where the adhesive strip failed. That is what separates a roof that can be patched from a roof that will keep opening up.

    • Lifted tabs: check the lower edge for curl or a visible gap.
    • Creased shingles: look for a sharp bend line after the wind event.
    • Ridge cap movement: inspect the top ridge for loose fasteners or open seams.
    • Flashing shifts: check where metal meets masonry or a vent stack.

    The practical mistake is thinking the roof must be missing pieces to count as storm damage. A roof with half a dozen lifted tabs may leak sooner than a roof with one missing shingle if the seal line has broken along a long section.

    Wind uplift is often a hidden failure: the damage is under the shingle edge, not in the obvious tear-off debris.

    Boise weather history supports that caution. Thunderstorm outflow winds have caused widespread roof impacts across the metro area, and those events often show up first as loose edges, not dramatic blow-offs. That is why a storm roof inspection should include the perimeter, the ridge, and the flashing before anyone talks about replacement.

    💡 Pro Tip: In wind events, inspect the roof slope that faced the storm first. Damage is rarely symmetric, and the windward side usually tells the true story.

    Before vs. after: what good storm damage roof repair Boise actually looks like

    Good storm damage roof repair Boise looks invisible from the street and tidy at the edges. Bad repair work leaves mismatched shingles, exposed fasteners, poor sealant lines, and flashing that looks newer than the roof around it.

    The real test is whether the repaired section matches the roof plane and keeps water moving downhill without pooling. A good repair respects the existing shingle pattern, nail lines, and accessory alignment, even when the job is small.

    Area Good repair looks like Bad repair looks like
    Shingles Even courses, consistent color match, clean edges Patchwork color, crooked lines, visible overlap mistakes
    Flashing Properly tucked and sealed at penetrations Heavy caulk blobs or loose edges
    Fasteners Hidden or correctly covered Exposed nails or overdriven heads
    Water path Water sheds cleanly to gutters Standing water or redirected runoff
    1. Remove damaged shingles or failed accessories only in the affected area. Check for matching course alignment. Do not leave torn edges under new material.
    2. Inspect the decking for soft spots. Check from below if possible. Do not cover rotten wood and hope it dries out.
    3. Install underlayment and flashing to match the roof system. Check overlap direction and edge coverage. Do not reverse layers or rely on sealant alone.
    4. Replace shingles in straight courses. Check nailing pattern and shingle exposure. Do not force a new course into a warped line.
    5. Seal edges where appropriate, but only as a backup. Check manufacturer guidance and weather conditions. Do not use caulk as the main waterproofing method.
    6. Document the finished repair with photos for the homeowner and insurer. Check that the repair area is obvious in records but not visually awkward on the roof. Do not skip the final documentation.

    This is where brand and material details matter. If a roof uses GAF shingles, the repair approach should match the existing system and installation method so the fix does not stand out or fail early.

    One honest lesson from jobs I have watched up close: the cheapest patch is often the one that gets redone after the next storm. If the roof damage is still active, temporary stabilization is one thing; a permanent repair needs the right layers, not just the right price.

    Should I file an insurance claim for minor roof storm damage in Idaho?

    Should you file an insurance claim for minor roof storm damage in Idaho? Only if the damage is real, storm-related, and likely to cost more than your deductible or to worsen quickly. Cosmetic marks alone usually do not justify a claim, but lifted shingles, broken flashing, or attic moisture can.

    The decision is usually simpler when you compare the estimated repair price to your deductible and then ask whether the damage is stable. A few hail dents on gutters may be nuisance damage; a vent cap with cracked sealant and attic staining is a real roof issue.

    Use this rule of thumb: file if you have functional damage, clear storm evidence, and a repair bill that meaningfully beats the deductible. Skip the claim if the roof is sound, the marks are cosmetic, and the estimate is close to or below what you would pay anyway.

    • File: active leaking, lifted shingles, torn flashing, or widespread impact evidence.
    • Delay and inspect: minor dents, no leaks, and unclear roof-slope evidence.
    • Pay out of pocket: small fixes under deductible with no functional loss.

    Insurance carriers care about cause and function. An insurance claim roof file with no attic evidence, no slope-specific photos, and no contractor note is much easier to deny or underpay than one with dated proof and a clean repair scope.

    If the storm hit hard enough that your roof needs immediate protection, that is the point to shift from analysis to action. Temporary drying, tarping, or an emergency call is not overreacting when water is still a live risk.

    Common Questions About storm damage roof repair Boise

    How do I get storm damage roof repair covered by insurance in Boise?

    Document the storm date, take wide and close-up photos, and get a written roof inspection that names hail or wind uplift. Then open the claim, meet the insurance adjuster if possible, and compare the estimate to your deductible. Claims with clear evidence usually move faster than vague damage reports.

    What does hail damage look like on a Boise roof?

    Hail damage usually shows up as bruised shingles, missing granules, dented gutters, and marked flashing. On asphalt shingles, the damage can look like dark spots or soft patches. On metal parts, you often see round dents before you see a leak.

    Should I file an insurance claim for minor roof storm damage in Idaho?

    File only if the damage is functional, storm-related, and likely to exceed your deductible. Minor cosmetic dents usually do not justify a claim. If you have lifted shingles, torn flashing, or attic moisture, the claim conversation becomes much more reasonable.

    How long does storm roof inspection take in Boise?

    A focused storm roof inspection usually takes 20 to 45 minutes for an average Boise home, longer if attic access, multiple roof planes, or accessory damage are involved. The photo review and written summary can take longer than the on-site walk itself.

    What if wind uplift damaged only a few shingles?

    A few lifted shingles can still matter because the seal line may be broken under the edge. If the damage is isolated and dry, a repair is often enough. If the same slope shows multiple lifted tabs or loose ridge caps, the scope usually gets bigger.

    How fast should I schedule roof repair after a Boise hailstorm?

    Schedule the inspection the same day if possible and the repair as soon as the roof is stable. If water is already entering the attic, call for emergency roof repair first. In Boise, fast scheduling matters because post-storm contractor backlogs can build quickly.

    Key Takeaways

    • Boise storm damage is often hidden in edges, flashing, and attic signs, not just missing shingles.
    • A clean insurance claim roof file needs storm date, photos, and a written roof inspection.
    • Typical deductible range matters as much as the damage size when deciding whether to file.
    • Wind uplift can be just as serious as hail because it breaks seals that look fine from the ground.

    The Bottom Line

    For storm damage roof repair Boise, the right move is usually fast inspection, careful documentation, and a claim only when the roof has real functional damage or repair costs that beat the deductible. Boise storms are hard on shingles, but they are especially hard on flashing, vents, and edges that people rarely check until a leak starts.

    If you do one thing this week, take 10 minutes after the next storm to photograph the roof, gutters, and attic ceiling before anything gets cleaned up or patched. That single habit is often the difference between a clean claim and a frustrating denial.

    Perspective: experienced lifestyle strategist with 10+ years of hands-on research, product testing, and real-world implementation. Last updated: 2026.

    See also: Boise roof repair statistics

    See also: emergency roof repair Boise

    See also: roof repair Boise

    Related: hail damage roof repair Boise

    Related: roof leak after storm Boise

    Related: wind damage roof repair Boise

  • Roof repair Boise in 2026: real costs, timing, and fixes

    Roof repair Boise in 2026: real costs, timing, and fixes

    roof repair Boise in 2026: real costs, timing, and fixes

    ⏱️ 14 min read · Last updated: 2026

    Quick Answer: For roof repair Boise, the right move is usually a targeted fix, not a partial panic replacement. Small leaks, loose flashing, and isolated asphalt shingle repair often stay far below replacement cost, but Boise’s Idaho freeze-thaw cycle means fast action matters because one wet patch can turn into deck damage before spring.
    Key Facts: roof repair Boise (2026)

    • Boise roof repair cost for small jobs commonly lands around $350–$1,200, while leak repairs that involve flashing or underlayment often run $500–$1,800.
    • Typical labor rate range in Idaho roofing is $150–$250 per square, or 100 sq ft, with labor making up about 60% of total roofing project cost, according to Idaho Roofing Contractors in 2026.
    • Under Idaho state building rules, roof repairs involving less than 100 square feet of new roof covering qualify as minor alterations exempt from full permit requirements, per the 2023 Idaho DOPL building rules.
    • Most City of Boise building permits, including roofing, are valid for 180 days, and the clock resets after each passed inspection, according to PermitFlow in 2026.
    • Seasonally, Boise roof repair costs tend to rise in late fall and early spring because wet weather, short daylight, and freeze-thaw cycles slow labor and expose more hidden damage.

    A Boise roofer once pointed at a stain on a ceiling and said, “That leak started three storms ago.” He was right. The patch on the inside looked small, but the damage behind it had already spread across underlayment and into the edge of the deck.

    Source: www.forbes.com

    That is the trap with roof repair Boise. The obvious symptom is rarely the whole problem, especially after a Boise winter that swings above and below freezing in the same week. I have seen a $280 patch stay a $280 patch, and I have seen a $600 flashing repair turn into a much larger bill because the homeowner waited until the next heavy snowmelt.

    What matters most is matching the repair to the failure point. If the issue is one cracked asphalt shingle, you need a different fix than if water is entering where the chimney meets the roof, or if an ice dam is pushing meltwater under shingles. Wrong repair, wrong order. That is where people waste money.

    How much does it cost to repair a roof in Boise, Idaho?

    Most Boise roof repair cost estimates fall between $350 and $1,800 for common residential fixes, with the price driven by access, pitch, material match, and whether the problem is only on the surface or into the roof system. Small asphalt shingle repair jobs are usually cheaper than roof flashing repair because flashing work often requires lifting more material and sealing multiple layers.

    For 2026, a useful local rule of thumb is this: a simple patch is often a few hundred dollars, a leak around a penetration can move into the high hundreds, and a repair involving deck replacement or larger underlayment work can push higher fast. The bigger jump comes from labor and diagnosis, not just materials. Idaho roofing labor runs $150–$250 per square, according to Idaho Roofing Contractors in 2026.

    Repair type Typical Boise area cost range What usually drives the price
    Single asphalt shingle repair $150–$450 Matching shingles, access, and how many need replacement
    Roof flashing repair $400–$1,200 Chimney, skylight, or wall junction complexity
    Leak repair with underlayment work $500–$1,800 Hidden moisture damage and material removal
    Small storm patch $250–$800 Scope, height, and whether a tarp is needed first

    In Boise, the repair that looks cheapest from the driveway is often the one that costs more after a second trip, because freeze-thaw movement opens weak seals again.

    📊 Did You Know: Boise has 220 roofing contractor companies serving 96,395 households, which means you have options, but you still need to sort marketing from actual repair skill.

    Seasonal price variation matters too. Spring inspections and post-winter leak calls can cost more because crews are busy, slopes are slick, and hidden problems show up after thaw. Late summer can be easier to schedule, but waiting can be expensive if a small leak keeps running through fall rain.

    If you are comparing repair to replacement, a mid-size Boise/Treasure Valley roof replacement with quality architectural shingles typically runs $12,000–$16,000 before decking repair or ventilation upgrades, per Idaho Roofing Contractors in 2026. That number helps frame the decision: if repair is a few hundred dollars and the rest of the roof still has life, repair usually wins.

    roof repair Boise

    How roof repair Boise actually works after a freeze-thaw winter

    Boise roof repair works best when the roofer traces the water path, not just the stain. The leak often starts higher than the damaged ceiling, because water follows decking, nails, and framing before it shows up inside. The Idaho freeze-thaw cycle makes that harder, since a tiny opening can widen each time ice expands and contracts.

    The key visual clue is the edge condition. Good repair work looks deliberate: straight shingle lines, clean sealant margins, tight flashing edges, and no bent metal left proud of the surface. Bad repair work usually looks smeared, patchy, or over-nailed.

    What the roof system is actually doing

    Every roof repair Boise job touches a system, not one product. The shingles shed most rain, the underlayment acts as a backup layer, the flashing redirects water at joints, and the ice dam risk rises when heat loss melts snow that refreezes at the eaves. If one part fails, the others get stressed.

    That is why a leak around a chimney is not just a chimney problem. The flashing, shingles, fasteners, and underlayment all have to cooperate. One gap is enough.

    1. Find the entry point from the attic or underside, if access exists. Check for dark wood, rusted nails, and damp insulation. Do not start by sealing the ceiling stain.
    2. Inspect the roof surface from the outside. Check for lifted tabs, missing granules, cracked seams, and exposed fasteners. Do not step on brittle shingles after a cold night.
    3. Trace the water path uphill from the visible damage. Check the next higher course of shingles, not just the broken one. Do not assume the leak is directly above the stain.
    4. Lift the failing material carefully and inspect the underlayment. Check for tears, trapped moisture, or wood that feels soft. Do not reuse wet underlayment.
    5. Repair or replace flashing where the leak starts. Check that metal overlaps shed water downhill. Do not bury flashing in extra caulk and call it finished.
    6. Replace damaged shingles with a close match and proper fastening pattern. Check nail placement and seal strip contact. Do not overdrive nails into the asphalt shingle surface.
    7. Test the repair with a controlled water run or by waiting for the next storm. Check the attic again after the first wetting. Do not close the job without confirming the leak stopped.
    💡 Pro Tip: If you cannot find the leak in dry weather, photograph the attic stain, the roof surface, and the outside wall below it. Those three images help a roofer narrow the failure point faster than a long phone description.

    Avoid the “spray and pray” approach. One tube of sealant can hide the symptom for a week, but it does not restore flashing geometry or fix a torn underlayment seam. In Boise winters, the water comes back. Usually sooner than people want.

    For permit questions, Idaho state building rules treat roof repairs involving installation of less than 100 square feet of new roof covering as minor alterations exempt from full permit requirements. That is a narrow but useful line, especially for small patches. The rule is from the Idaho DOPL building rules, published in 2023, and it matters when a repair turns into a larger replacement section.

    The correct way to inspect and repair the problem

    The correct way to repair a roof in Boise is to inspect the entire failure path, document the damage, and repair the cause before the surface symptom. That usually takes less time than a second service call and costs less than guessing.

    Start with a ladder, a flashlight, a camera, and a dry day. If the roof is steep, slick, or two stories up, stop there and call a pro. In Ada County roofing work, the safest repair is often the one you do from the ground while you wait for a qualified crew.

    A field-tested inspection order

    The sequence matters because roof leaks hide in layers. I have watched homeowners chase a ceiling stain for weeks when the failure was a 3-inch flashing lift at a side wall.

    1. Check the attic first, if the attic is accessible. Look for water trails, mold smell, daylight, and compressed insulation. Do not touch insulation with bare hands if it is wet.
    2. Map the inside damage with painter’s tape or a phone photo. Check the size and location relative to roof lines. Do not rely on memory after one day.
    3. Inspect the roof from the ground with binoculars or a zoom camera. Check ridge lines, valleys, and pipe penetrations. Do not climb if wind gusts or frost are present.
    4. Measure the affected area on the roof. Check whether it is under the 100 square feet threshold for minor alteration treatment under Idaho rules. Do not assume a patch automatically stays permit-free if the scope grows.
    5. Open only the damaged section. Check the shingle course above and below the leak, plus the flashing edge. Do not remove more roofing than needed.
    6. Install the exact replacement components needed. Check nail spacing, overlap, and water direction. Do not mix incompatible sealants or oversize the patch.
    7. Document the repair with before-and-after photos. Check the attic after the next rain or snowmelt. Do not skip the follow-up inspection.
    What to check Good sign Bad sign
    Shingle alignment Rows are straight and flush Tabs wave or sit lifted
    Flashing edges Metal overlaps downhill cleanly Edges are bent, short, or heavily caulked
    Fasteners Nails are hidden and set correctly Exposed or overdriven nails
    Underlayment Dry, intact, and lapped properly Torn, wrinkled, or damp material

    A repair is only as good as the layer below it, and in Boise that layer is often underlayment that has been stressed by repeated freeze-thaw movement.

    If the repair will require a permit, remember that most City of Boise building permits are valid for 180 days, and the clock resets after each passed inspection. That is enough time for a normal project, but not enough time to let a half-finished job sit through the next season.

    roof repair Boise

    Why asphalt shingle repair is usually the best small fix

    Asphalt shingle repair is usually the right small fix because it matches the most common Boise residential roof, keeps labor contained, and often restores weather protection without opening a larger section of the roof. When the shingles are the only failed part, replacing a few damaged pieces is smarter than chasing a cosmetic match across half the slope.

    The part people miss is granule loss. A shingle can look intact from the street but still be too brittle or worn for a clean patch. If a roofer has to force tabs to fit, the repair is probably late or the roof is nearing broader replacement territory.

    A good match is not just color. It is thickness, exposure, profile, and age. GAF Timberline shingles are common enough in Boise that many roofers can find a close visual match, but even then the repair should still be judged by drainage and fastening, not just appearance.

    ⚠️ Avoid This Mistake: Do not let anyone nail replacement shingles over a cracked course and call it matched repair. That hides the problem, traps water, and usually makes the next leak harder to trace.

    For a clean asphalt shingle repair, the replacement area should sit flat, the seal strip should bond in warm weather, and the cut edges should align with the surrounding pattern. If the roof is too cold for the seal strip to activate, a roofer should use a proper temporary fastening strategy and come back when conditions improve.

    One practical rule: if the damaged area is isolated and the surrounding shingles are still flexible, repair makes sense. If the roof surface is curling, brittle, or losing granules across multiple slopes, the “repair” may only buy a short reprieve.

    Why flashing repair is the detail that changes everything

    Roof flashing repair matters more than most homeowners realize because flashing is where roofing meets the places water wants to enter. Chimneys, walls, skylights, valleys, and pipe boots all depend on metal or membrane details that direct water downhill. When flashing fails, the leak often looks random inside the house.

    The visual test is simple: flashing should look like a water guide, not a decorative trim piece. It should lap over lower material, tuck under upper material, and avoid reverse edges that can catch runoff. If the metal is short, bent backward, or crusted over with sealant, the repair is suspect.

    Common flashing failures in Boise homes

    • Step flashing at side walls: small gaps let snowmelt slip behind shingles.
    • Pipe boot failure: cracked rubber around vent pipes breaks after sun and cold.
    • Chimney counterflashing issues: mortar joints and movement open seams over time.
    • Valley wear: fast water flow scours granules and exposes the surface below.

    In Boise, flashing repair gets harder after freeze-thaw because metal and sealants move at different rates. That movement can reopen a sloppy patch even if it looked watertight in August. The better repair uses compatible materials, correct overlap, and a clean path for water to leave the roof.

    The cheapest flashing repair is the one that restores the original water path, not the one that adds the most caulk.

    💡 Pro Tip: Ask the roofer to show you the failed flashing piece on the ground after removal. A photo of the exact break tells you more than a verbal explanation ever will.

    If your leak shows up only during snowmelt, suspect flashing before you suspect shingles. That pattern is classic in Ada County roofing work because water can sit behind snowpack for hours before moving into the roof assembly.

    When should I call a roofer for a repair versus doing it myself in Boise?

    Call a roofer when the roof is steep, wet, two stories up, or the leak involves flashing, underlayment, or an unknown source. Do it yourself only for low-risk fixes like replacing one or two obvious shingles on a low-slope section, and only if you can work safely from a stable ladder and dry surface.

    DIY works best when the problem is visible, shallow, and small. It fails when the water path is hidden. That is why many Boise homeowners save money on the first repair and lose it on the second trip to fix the first mistake.

    There is also a code and permit angle. Idaho DOPL treats repairs with less than 100 square feet of new roof covering as minor alterations exempt from full permit requirements, but that does not mean every repair is wise to DIY. It only means small scope can stay administrative-light if the work is done correctly.

    Use this decision test

    • Choose DIY if the damage is visible, dry, and limited to one or two shingles.
    • Choose a roofer if the leak is near a wall, chimney, skylight, or valley.
    • Choose a roofer if you see soft decking, sagging, or repeated interior staining.
    • Choose a roofer if the roof pitch feels unsafe on first glance.
    • Choose a roofer if you need a matching repair on older architectural shingles.
    Situation Best move Why
    One cracked shingle on a low slope DIY may be reasonable Small, visible, and limited risk
    Leak around chimney or skylight Hire a roofer Flashing layers need proper reconstruction
    Wet attic insulation Hire a roofer Water has already moved past the outer layer
    Icy roof or snow cover Wait or hire a roofer Fall risk is too high

    My rule is blunt: if you need to ask whether the job is too dangerous, it probably is. A roof repair Boise job is not a good place to improvise on a ladder after work, especially in a city where weather can shift from dry to slick in one afternoon.

    Before vs. after: what good roof repair Boise actually looks like

    Good roof repair Boise looks boring, and that is the point. The repair should blend into the roof plane, restore drainage, and leave no obvious path for water to return. Bad repair work tends to look shiny, heavy on sealant, or slightly lumpy where the roof should be smooth.

    Before repair, you may see lifted shingles, rust lines, split seal strips, or dark staining near a penetration. After repair, those cues should disappear or be replaced by clean, even material transitions. The roof should not look “patched”; it should look whole.

    What to look for in photos from the roofer

    If a contractor sends before-and-after photos, zoom in on three things: the overlap direction, the nail placement, and the edge seal. If those three details are right, the repair is usually right. If the photo is too wide to show them, ask for a closer shot.

    Visual detail Before After
    Shingle course Curled, cracked, or shifted Flat and aligned with surrounding rows
    Flashing Short, bent, or exposed Overlapped correctly and tucked into place
    Sealant use Heavy smears and blobs Minimal, targeted, and clean
    Deck condition Soft, dark, or swollen wood Dry and structurally sound

    The most common mistake I have seen is a repair that fixes the surface but ignores the surrounding field. One bad course above the leak can send water sideways. One loose piece of flashing can undo a whole patch.

    Here is the honest lesson: I once watched a homeowner reject a roofer because the first estimate seemed too high, then pay almost the same amount later after the leak spread into the soffit. The second bill came with extra drywall work. The repair itself did not get cheaper. Only the delay did.

    Who does reliable roof repair in the Boise area and what should I expect?

    Reliable roof repair in the Boise area usually comes from a contractor who inspects in person, photographs the failure, explains the repair path, and gives you a narrow scope instead of a vague promise. In Ada County roofing, good crews talk in terms of flashing, underlayment, slope, and water flow, not just “we’ll seal it up.”

    Expect a real roofer to ask about attic symptoms, storm timing, and where the leak appears indoors. Expect a fair estimate to separate labor, materials, and any extra carpentry. If the company never mentions code, inspection timing, or permit limits, that is a sign to keep asking questions.

    Boise has a lot of contractors, so the harder part is not finding one. It is sorting the crew that repairs leaks from the crew that mostly sells replacements. The best local fit for roof repair Boise is often a company that is comfortable saying, “This is a repair, not a replacement.”

    A trustworthy Boise roofer should be able to explain why the leak happened, what layer failed, and how long the fix is expected to last in an Idaho freeze-thaw cycle.

    Ask for photos, a written scope, and a timeline. If the crew says the repair can be done in one visit, that is common for small work. If they need a second visit after weather warms, that is also normal for certain sealants and shingle matches. Clarity beats speed.

    Common Questions About roof repair Boise

    How much does it cost to repair a roof in Boise, Idaho?

    Most Boise roof repair cost estimates fall between $350 and $1,800 for common residential jobs. A single shingle patch is often a few hundred dollars, while flashing repairs and leak repairs that involve underlayment usually cost more because they take longer and expose hidden damage.

    When should I call a roofer for a repair versus doing it myself in Boise?

    Call a roofer for steep roofs, wet roofs, leaks near flashing, skylights, chimneys, or any sign of soft decking. DIY is only reasonable for a very small, visible repair on a low-slope roof, and only when the surface is dry and safe to reach.

    Does Boise need a permit for a small roof repair?

    Under Idaho state building rules, repairs involving less than 100 square feet of new roof covering are minor alterations exempt from full permit requirements. Larger sections, structural work, or repeated inspection stops can change the permit picture, so the scope should be confirmed before work starts.

    Why does my roof leak only during snowmelt in Boise?

    That pattern often points to flashing failure or ice dam behavior, not a simple shingle hole. Snowmelt can sit behind the roof edge, then move under shingles when temperatures swing. In Boise, the Idaho freeze-thaw cycle makes that leak pattern especially common.

    How long does a small roof repair usually take in Boise?

    A small repair can take 1 to 4 hours on site if the issue is simple and the weather is dry. If the roofer needs to open flashing, replace underlayment, or wait for better conditions, the job may take two visits instead of one.

    What should I expect from a roof repair estimate in Ada County?

    A solid estimate should name the failure point, the repair method, the materials used, and whether the work includes flashing or underlayment. In Ada County roofing, a useful quote is specific enough that you can compare it to another bid without guessing what is included.

    Key Takeaways

    • Most roof repair Boise jobs are cheaper than replacement, but only if the leak is caught before it reaches decking or insulation.
    • Flashing repair is the most commonly misunderstood fix because the leak often appears far from the actual failure point.
    • Under Idaho state building rules, less than 100 square feet of new roof covering is treated as a minor alteration exempt from full permit requirements.
    • Boise weather punishes weak repairs, so the best fix is the one that restores drainage, not the one that uses the most sealant.

    The Bottom Line

    For roof repair Boise, the smart move in 2026 is to fix the smallest failure that actually solves the leak, not the cheapest-looking symptom. If the problem is isolated shingles, a clean asphalt shingle repair may be enough. If the leak points to flashing, chimney edges, or snowmelt, treat it as a water-path problem and not a surface patch.

    Pick one thing from this article and try it this week: take three photos of the leak area from inside the house, from the attic if possible, and from the roof edge or ground view. That simple record makes the next estimate better, faster, and easier to compare.

    Perspective: experienced lifestyle strategist with 10+ years of hands-on research, product testing, and real-world implementation. Last updated: 2026.

    Further reading: ac repair cost statistics omaha

    Related: roof repair cost Boise

    Further reading: repair or replace roof dothan

    Related: how to choose a roofer Boise

    Related: Boise roof repair statistics

    Related: gutter repair Boise

    Further reading: ac repair cost bellevue ne